(function() {
document.addEventListener('DOMContentLoaded', function() {
var componentMetadata = JSON.parse('\x7b\x22componentName\x22\x3a\x22ChannelLinks_a10c1938-4321-41d4-9bf0-aa7515c085e6\x22,\x22deferOptions\x22\x3a\x7b\x22deferComponent\x22\x3afalse,\x22deferType\x22\x3a\x22None\x22,\x22deferId\x22\x3a\x22r0e2aba38f1e3445d9edc8a214b24387c\x22,\x22deferredContainerId\x22\x3a\x22\x2fchannelLinks\x22,\x22deferredContainerView\x22\x3anull\x7d,\x22viewName\x22\x3a\x22ChannelLinks\x22\x7d');
var configuration = {};
var moduleName = 'channelLinks';
var isVueModule = true;
GeneralMills.PandoSites.RegisterControlInstance(moduleName, configuration, componentMetadata, isVueModule)
});
})();
(function() {
document.addEventListener('DOMContentLoaded', function() {
var componentMetadata = JSON.parse('\x7b\x22componentName\x22\x3a\x22ActionToolbar_bcfe5168-4c6e-4b8a-8181-233a0a250020\x22,\x22deferOptions\x22\x3a\x7b\x22deferComponent\x22\x3atrue,\x22deferType\x22\x3a\x22OnDemand\x22,\x22deferId\x22\x3a\x22r2ba2923ddf9f4fa49df449023b99a2ac\x22,\x22deferredContainerId\x22\x3a\x22\x2ffloatingActionToolbar\x2ffloatingActionToolbar_interop\x22,\x22deferredContainerView\x22\x3a\x22InteropDeferWrapper\x22\x7d,\x22viewName\x22\x3a\x22ActionToolbar\x22\x7d');
var configuration = {"contentId":"4aa88fc9-ca3c-4418-add3-52c770633edd","toolbarSettings":{"id":"bcfe5168-4c6e-4b8a-8181-233a0a250020","regAction":"FAVORITE","eSourceCode":14171,"namePassedToEvents":"ArticleStandardLongFormToolbar","buttons":[{"providerName":"pinterest","providerNamePassedToEvents":"Pinterest","shareUrlFormat":"//pinterest.com/pin/create/link/?url={0}","id":"63cf42f0-8fed-4b1c-acbe-0fe44811231d","allowedForAnonymousUsers":true,"type":"Social","displayName":"Pinterest","namePassedToEvents":"Pinterest","cssClassName":"atButtonPinterest","privacyOptOutMessage":"\u003cdiv class=\u0027privacyMessage\u0027\u003e\n\u003ch3\u003eThis feature is not available with your current cookie settings.\u003c/h3\u003e\n\u003cp\u003eYou can \u003ca href=\u0027#\u0027 data-show-preference-center=\u00271\u0027\u003eupdate your privacy settings\u003c/a\u003e to enable this content. Please enable “Functional Cookies” to use this feature.\u003c/p\u003e\n\u003c/div\u003e","showPrivacyOptOutMessage":false},{"addFavoriteErrorMessage":"Sorry, something went wrong. Please save again.","removeFavoriteErrorMessage":"Error occurred while removing from favorites","regAction":"FAVORITE","eSourceCode":14171,"isCurrentUserAnonymous":false,"isFavoriteItem":false,"id":"351369d5-f1b1-4a90-b495-16074575bb8a","allowedForAnonymousUsers":false,"type":"Favorite","displayName":"Save","namePassedToEvents":"Favorite","cssClassName":"atButtonFavorite","privacyOptOutMessage":"\u003cdiv class=\u0027privacyMessage\u0027\u003e\n\u003ch3\u003eThis feature is not available with your current cookie settings.\u003c/h3\u003e\n\u003cp\u003eYou can \u003ca href=\u0027#\u0027 data-show-preference-center=\u00271\u0027\u003eupdate your privacy settings\u003c/a\u003e to enable this content. Please enable “Functional Cookies” to use this feature.\u003c/p\u003e\n\u003c/div\u003e","showPrivacyOptOutMessage":false},{"providerName":"facebook","providerNamePassedToEvents":"Facebook","shareUrlFormat":"//facebook.com/sharer/sharer.php?u={0}","id":"6d176960-1afd-4a34-83b5-795429359551","allowedForAnonymousUsers":true,"type":"Social","displayName":"Facebook","namePassedToEvents":"Facebook","cssClassName":"atButtonFacebook","privacyOptOutMessage":"\u003cdiv class=\u0027privacyMessage\u0027\u003e\n\u003ch3\u003eThis feature is not available with your current cookie settings.\u003c/h3\u003e\n\u003cp\u003eYou can \u003ca href=\u0027#\u0027 data-show-preference-center=\u00271\u0027\u003eupdate your privacy settings\u003c/a\u003e to enable this content. Please enable “Functional Cookies” to use this feature.\u003c/p\u003e\n\u003c/div\u003e","showPrivacyOptOutMessage":false},{"templateId":"eb460499-2547-4f84-a197-60f31934a3b9","dialogHeading":"Email Article","emailCode":"PB_ContentEmail","dialogSettings":{"cancelButtonText":"Cancel","copyToSenderLabel":"Send a copy to myself","emailAddressesLabel":"* Email Address","emailInstructionText":"Separate email addresses with commas","fromText":"From:","privacyPolicyText":"\u003cp\u003e\u0026copy;2024 General Mills, Inc. All Rights Reserved. This information will only be used to send an email to your friend(s) and will not be saved. Please read our \u003ca rel=\u0022noopener noreferrer\u0022 rel=\u0022noopener noreferrer\u0022 href=\u0022http://www.generalmills.com/company/privacy-policies/privacy-policy-us\u0022 target=\u0022_blank\u0022 shape=\u0022rect\u0022\u003ePrivacy Policy\u003c/a\u003e.\u003c/p\u003e","requiredFieldText":"* Required","sendButtonText":"Send","senderEmailAddressLabel":"* Your Email Address","senderFirstNameLabel":"* Your First Name","sendToText":"Send To:"},"id":"2a5b12c8-299b-467d-812e-41e9a0afb70d","allowedForAnonymousUsers":true,"type":"Email","displayName":"Email","namePassedToEvents":"Email","cssClassName":"atButtonEmail","privacyOptOutMessage":"\u003cdiv class=\u0027privacyMessage\u0027\u003e\n\u003ch3\u003eThis feature is not available with your current cookie settings.\u003c/h3\u003e\n\u003cp\u003eYou can \u003ca href=\u0027#\u0027 data-show-preference-center=\u00271\u0027\u003eupdate your privacy settings\u003c/a\u003e to enable this content. Please enable “Functional Cookies” to use this feature.\u003c/p\u003e\n\u003c/div\u003e","showPrivacyOptOutMessage":false},{"layoutParameter":"p%3d1","id":"783fefb5-010a-4be1-b84d-f0447da7c52c","allowedForAnonymousUsers":true,"type":"Print","displayName":"Print","namePassedToEvents":"Print","cssClassName":"atButtonPrint","privacyOptOutMessage":"\u003cdiv class=\u0027privacyMessage\u0027\u003e\n\u003ch3\u003eThis feature is not available with your current cookie settings.\u003c/h3\u003e\n\u003cp\u003eYou can \u003ca href=\u0027#\u0027 data-show-preference-center=\u00271\u0027\u003eupdate your privacy settings\u003c/a\u003e to enable this content. Please enable “Functional Cookies” to use this feature.\u003c/p\u003e\n\u003c/div\u003e","showPrivacyOptOutMessage":false}],"isSticky":true},"userSettings":{"isCurrentUserAnonymous":true,"isFavoriteItem":false},"pageAttributes":{"url":"https%3a%2f%2fwww.pillsbury.com%2feveryday-eats%2fdinner-tonight%2fhow-to-cook-a-turkey-our-easy-no-fail-method%3fpn%3d1%26ps%3d20","contentId":"4aa88fc9-ca3c-4418-add3-52c770633edd"},"recaptchaPublicKey":"6LceAigUAAAAAC8aIQvJ9yRpRl3r1ZBKbou-tIDe"};
var moduleName = 'actionToolbar';
var isVueModule = true;
GeneralMills.PandoSites.RegisterControlInstance(moduleName, configuration, componentMetadata, isVueModule)
});
})();
So, you’ve been nominated as this year’s Turkey Day host. (Or maybe you volunteered? Awesome. It really is refreshing to not pack up and drive for a one-day event.) Now what? Follow our quick how-to for tips and tricks so you can skip the stress and get straight to enjoying friends, family and YOUR fine food!
Picking a Turkey
Fresh vs. Frozen
While it can be argued a fresh, never-been-frozen turkey is superior, it’s not the most critical piece of turkey prep. If your turkey is well seasoned and properly cooked no one will know the difference—so pick one that works for you. A fresh turkey can be kept in the refrigerator for one to two days before serving, so it’s your best bet if you’re planning on preparing it soon. Frozen turkeys take some time to defrost, but have the benefit of keeping longer: Turkeys can be frozen for up to 12 months and are readily available at your grocer year ‘round.
Amount per Person
More critical is the size of your turkey. It’s best to plan for one pound of uncooked turkey per person. This allows enough for your table plus a few leftovers—which is especially nice at Thanksgiving. (Turkeys can weigh anywhere from eight to 24 pounds.)
How to Thaw a Turkey
We ALWAYS recommend thawing a frozen turkey in the refrigerator, for a max of 4 to 5 days. Keep the turkey in its store packaging for defrosting—the wrapping it comes in is designed to keep bacteria out and freshness in—and place it in a pan or on a rimmed baking sheet to catch any liquid that might leak out during thawing. See our handy table below for how long to thaw your bird:
| Turkey Size |
Defrost Time |
| 8 - 12 pounds |
1 - 2 days |
| 12 - 16 pounds |
2 - 3 days |
| 16 - 20 pounds |
3 - 4 days |
| 20 - 24 pounds |
4 - 5 days |
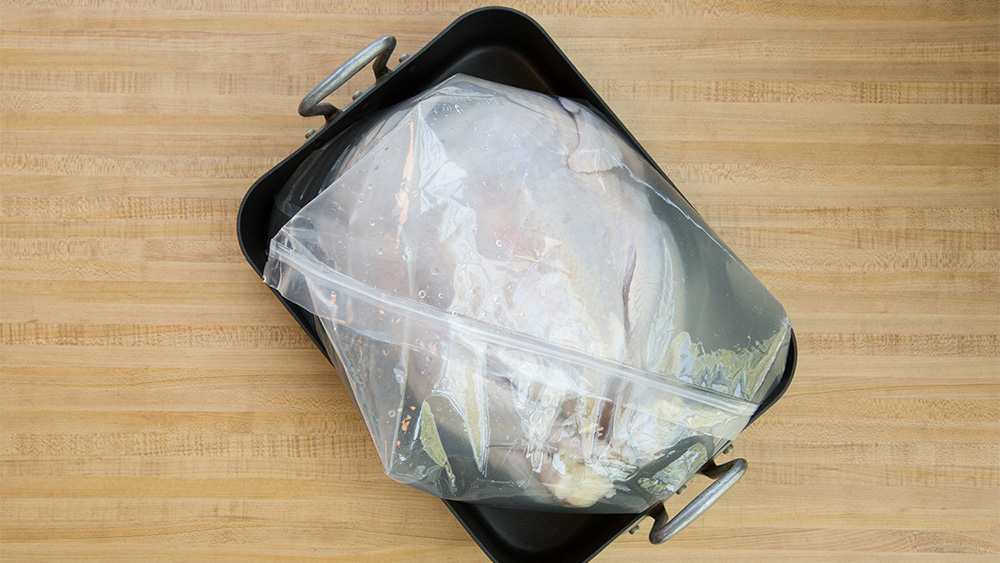
If your turkey is still frozen after a few days in the fridge, or you forgot to move it from the freezer to the fridge in time, you can try speeding things along using the “water-bath” thawing method. Here’s how to do it.
Start by thoroughly cleaning your sink (or use a deep pan of for cold water). Keep poultry in its original wrapper during thawing, or place in a resealable, heavy-duty plastic bag. Thaw the frozen uncooked turkey by completely covering it with cold water. Stay close by and change the water often—every 30 minutes—to keep it cold. Allow 30 minutes per pound to thaw. (That’s 10 hours for a 20-pound bird!)
And if you’re really pressed for time, the USDA offers directions for safe microwave thawing here.
How to Prepare a Turkey
Remove the Giblets
This isn’t really anyone’s favorite part, but it needs to be done. Once your turkey is completely defrosted, and before you move on to any other steps of preparation, it’s time to unwrap your turkey and remove the giblets. You’ll find the giblets in a little plastic or paper pouch inside the turkey cavity (check both the neck and end cavity). Just reach in and grab the pouch (you can try using tongs if you prefer!) from inside the bird. At this point you can either discard the giblets, or save them for another use, such as gravy or stuffing. That’s up to you—but what’s not up to you is washing your hands, which you should do immediately after this step!
Brining
Note: This step is totally optional, but if you’re going to brine your bird, this is when to do it.
Brining is a no-fail way to get a super-tender turkey packed full of flavor. It’s essentially soaking your turkey in a mixture of salt and water for up to 24 hours before baking. (You can also “dry-brine” your turkey by pre-seasoning it without the water element.)
To brine a turkey, you’ll need water, salt, a fresh or defrosted turkey (no frozen birds here!), and a brining container (something large enough to hold the turkey in the refrigerator). You can brine in any large container that is nonreactive, such as food-safe plastic, glass, crock or stainless-steel bowl. If you don’t have a big container, you can also use a sealable brining bag. Just be sure you have a base to hold the bag in place, like a rimmed baking sheet or even your roasting pan.
To make your brine, mix cold water and plain table salt in your container until salt is dissolved. You can add herbs and other aromatics if you prefer, but it’s not necessary. Here’s a handy cheat sheet for the amounts of water and salt you’ll need, based on the size of your bird:
| Turkey Size |
Water |
Table Salt |
| 8 to 12 pounds |
2 gallons |
1 1/4 cups |
| 13 to 17 pounds |
2 1/2 gallons |
1 3/4 cups |
| 18 to 22 pounds |
3 gallons |
3 1/2 cups |
Add your turkey to the brining container, making sure it’s fully covered by the liquid; use a heavy plate or dish to keep the meat submerged if necessary. Cover your container or seal your brining bag and refrigerate 8-12 hours for best results, and no more than 24 hours. (As a general rule, start with a minimum 1 hour per pound of food.)
When the brining time is up, remove turkey from its bag or container and dispose of the water.
Dry It Out
Drying the surface of your turkey is critical to getting a nice crispy skin during roasting. If you are brining your turkey, dry it after disposing of the water. If you’re not brining your turkey, you can dry it immediately after unwrapping and removing the giblets.
To dry your turkey, simply pat the surface dry with paper towels. No need to rinse. That’s it! For extra crispness, refrigerate uncovered at least 2 hours (or overnight) to let the skin dry out a bit, or proceed directly to cooking.
Even if you’re not someone who likes the skin, you should still leave it on the bird. The skin serves as a protective layer to keep your breast meat tender and moist. Simply remove the skin before serving.
Stuffing
While we’re huge fans of stuffing (as in the delicious Thanksgiving food), we’re actually not big fans of literally stuffing it inside of a turkey before roasting. There are a few reasons:
- Cooking stuffing inside your turkey doesn’t add much flavor to the turkey and can even skew your turkey roasting results: Sometimes the turkey is overcooked by the time your stuffing reaches a food-safe 165°F. (It takes a while!)
- Stuffing from inside the turkey is often soggy.
- You always need more stuffing than is able to fit inside the turkey.
Instead of cooking stuffing inside the turkey, try our oven-free Simple Slow-Cooker Stuffing. Life changing!
If you must stuff, consider using some rough-chopped aromatics instead: an onion, apple or citrus like lemon or orange. While you won’t eat these, they will add some flavor to your turkey.
How to Roast a Turkey
Now, there are many ways to cook a turkey but our favorite, by far, is a simple roast. Here’s how we do it with an 18-pound turkey.
Move oven rack to lowest position. Heat oven to 325°F. Place turkey breast side up in a shallow roasting pan, on a rack if you have one. If you’re using a disposable aluminum roasting pan, place that on top of a cookie sheet for extra support.
Using fingers, gently loosen skin covering turkey breast and thighs.
Spread 1/4 cup of softened butter evenly under skin.
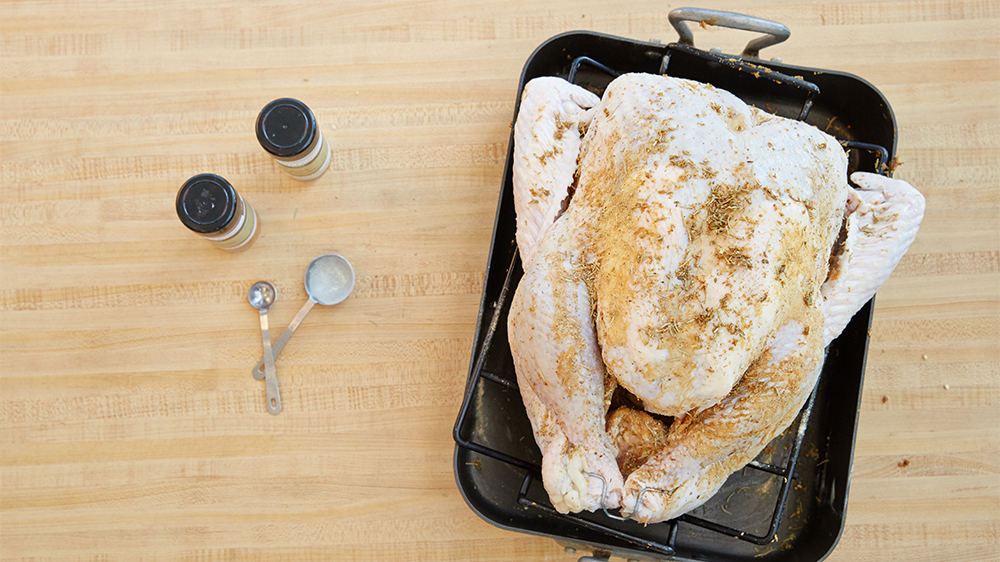
Season the Turkey
In a small bowl, combine some simple seasonings. You probably already have these on hand: 1 tablespoon garlic salt, 1 tablespoon dried oregano, 1 tablespoon dried rosemary, 1 1/2 teaspoons ground mustard, and 1/2 teaspoon ground red pepper or cayenne. Rub the dry seasoning mixture all over turkey.
Now tuck the wings underneath the back of the turkey. If it looks like your turkey is going to sunbathe in the oven you’ve done it right. At this point you could truss (tie) together your turkey legs with twine or butcher’s string to create a more compact shape. Some say this helps the turkey cook more evenly. Our bird actually came this way. (If you’re short on time, skip the trussing step!)
Drizzle 2 tablespoons of oil over your turkey.
At this point, insert an ovenproof meat thermometer so tip is in thickest part of inside thigh muscle and does not touch bone. This is our favorite way to ensure the turkey is cooked. The pop-up timers aren’t always accurate and a regular meat thermometer takes time to insert and remove—which can influence (delay) your cooking time.
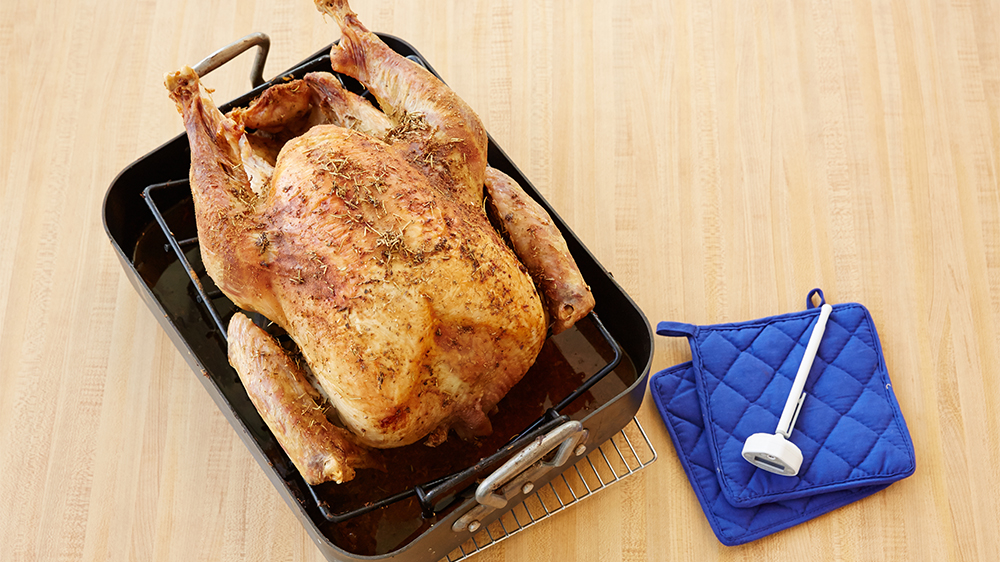
Roast the Turkey
Now, you’re ready for the oven! Roast the turkey uncovered in a 325°F oven for 2 hours. (Note: Roasting the turkey uncovered at the start of the bake time will increase the browning, so keep an eye on it.) It’s always best to start at a low temperature like this with a longer cook time; not only will your turkey will stay more moist at this temperature, but the lower heat also makes it easier to control if the skin crisps or darkens more quickly in spots. If you’ve trussed the turkey, you can remove trussing at this point to allow the inside of the thighs to cook thoroughly and evenly.
Roast for an additional 2 hours 15 minutes to 2 hours 45 minutes OR until thermometer reads 165°F and legs move easily when lifted or twisted. Once your thermometer reads 165°F, you can remove the turkey from the oven. Tent with aluminum foil and let stand 15 minutes before carving to let the juices evenly redistribute.
Brushing the skin with butter or juices every 30 minutes during baking will help to provide a moist and beautifully brown turkey. You can also use an oil-based mixture (1/2 cup olive or vegetable oil, 2 teaspoons chopped herbs, 1 teaspoon salt and 1 teaspoon pepper) to brush on the turkey. If the skin is browning up too quickly at any point, cover the turkey loosely with foil to prevent the browned areas from burning.
If your turkey has reached the desired doneness the skin isn’t getting crispy enough for your liking, you can always finish with a quick burst of higher heat (or a minute or two under the broiler) at the end without drying out the meat. Just be sure to watch it very closely because turkey can easily go from perfectly browned to overdone.
Note: The instructions above are for an 18-pound turkey. Follow this chart for roasting instructions based on the size of your turkey.
| Whole Turkey (not stuffed) |
Oven Temp. 325ºF |
| Weight |
Roasting Time |
Internal Temp. |
| 8-12 lbs |
2.75-3 hrs |
165ºF |
| 12-14 lbs |
3-3.75 hrs |
165ºF |
| 14-18 lbs |
3.75-4.25 hrs |
165ºF |
| 18-20 lbs |
4.25-4.5 hrs |
165ºF |
| 20-24 lbs |
4.5-5 hrs |
165ºF |
This feature is not available with your current cookie settings.
You can update your privacy settings to enable this content. Please enable all cookies to use this feature.
Other Ways to Cook Turkey
While roasting is the most traditional way to cook a turkey, sometimes you want to shake things up. Maybe you’re short on time? Short on oven space? Or maybe you’re just cooking for a few people. Here are other methods worth trying.
How to Carve a Turkey
Now that your turkey is cooked, it’s time to serve it up! Here’s the quick run-down of how to do it.
Step 1. Separate the white and dark meats.
While pulling leg away from body, cut to separate the drumstick from the breast. Repeat on the opposite side. Lift the breast while holding down the legs to separate the top from the bottom. Use one firm cut through the backbone to cut your turkey in half.
Step 2. Carve the leg and thigh meat.
Now you can pull the thigh away from the leg and cut on the joint to separate. Remove the thigh bone from the underside of the meat. With the skin-side up, cut into slices.
Step 3. Carve the breast meat.
Cut alongside the ribcage to remove the breast and tenderloin in one large piece. Hold the skin in place as you cut into slices.
For even more turkey carving tips and photos, read How To Carve a Turkey. You’ll look like a seasoned pro in no time!
The whole process can get kind of messy, so we recommend carving in the kitchen before serving. Have your platter nearby, so you can add pieces as you go.
Now for the best part: eating!
What to Do with Leftovers (If You Have Any)
If you plan on a pound of uncooked meat per person, you shouldn’t have much turkey left over. BUT, you can always plan on the generous side so you DO have some extra turkey for next-day enjoyment. Here are some of our favorite ways to keep the turkey party going.
(function() {
document.addEventListener('DOMContentLoaded', function() {
var componentMetadata = JSON.parse('\x7b\x22componentName\x22\x3a\x22ConsumerGeneratedContent_4aa88fc9-ca3c-4418-add3-52c770633edd\x22,\x22deferOptions\x22\x3a\x7b\x22deferComponent\x22\x3atrue,\x22deferType\x22\x3a\x22OnDemand\x22,\x22deferId\x22\x3a\x22rdb7bcf460ddb4d1d93dbb15d90dede5c\x22,\x22deferredContainerId\x22\x3a\x22\x2fratingReview\x2finteropRatingReview\x22,\x22deferredContainerView\x22\x3a\x22InteropDeferWrapper\x22\x7d,\x22viewName\x22\x3a\x22ConsumerGeneratedContent\x22\x7d');
var configuration = {"loaderScript":"https://apps.bazaarvoice.com/deployments/pillsbury-en_us/main_site/production/en_US/bv.js","type":"QuestionAndAnswer","language":"en","includeRatings":false};
var moduleName = 'consumerGeneratedContent';
var isVueModule = true;
GeneralMills.PandoSites.RegisterControlInstance(moduleName, configuration, componentMetadata, isVueModule)
});
})();