(function() {
document.addEventListener('DOMContentLoaded', function() {
var componentMetadata = JSON.parse('\x7b\x22componentName\x22\x3a\x22ChannelLinks_a10c1938-4321-41d4-9bf0-aa7515c085e6\x22,\x22deferOptions\x22\x3a\x7b\x22deferComponent\x22\x3afalse,\x22deferType\x22\x3a\x22None\x22,\x22deferId\x22\x3a\x22r7d283ab2e4d04404b3c9c32670220e0f\x22,\x22deferredContainerId\x22\x3a\x22\x2fchannelLinks\x22,\x22deferredContainerView\x22\x3anull\x7d,\x22viewName\x22\x3a\x22ChannelLinks\x22\x7d');
var configuration = {};
var moduleName = 'channelLinks';
var isVueModule = true;
GeneralMills.PandoSites.RegisterControlInstance(moduleName, configuration, componentMetadata, isVueModule)
});
})();
(function() {
document.addEventListener('DOMContentLoaded', function() {
var componentMetadata = JSON.parse('\x7b\x22componentName\x22\x3a\x22ActionToolbar_bcfe5168-4c6e-4b8a-8181-233a0a250020\x22,\x22deferOptions\x22\x3a\x7b\x22deferComponent\x22\x3atrue,\x22deferType\x22\x3a\x22OnDemand\x22,\x22deferId\x22\x3a\x22ra667b1e52b484fadb91ad4343f4e9b7d\x22,\x22deferredContainerId\x22\x3a\x22\x2ffloatingActionToolbar\x2ffloatingActionToolbar_interop\x22,\x22deferredContainerView\x22\x3a\x22InteropDeferWrapper\x22\x7d,\x22viewName\x22\x3a\x22ActionToolbar\x22\x7d');
var configuration = {"contentId":"b866ea6a-379b-40d9-a1c4-a102057a0b47","toolbarSettings":{"id":"bcfe5168-4c6e-4b8a-8181-233a0a250020","regAction":"FAVORITE","eSourceCode":14171,"namePassedToEvents":"ArticleStandardLongFormToolbar","buttons":[{"providerName":"pinterest","providerNamePassedToEvents":"Pinterest","shareUrlFormat":"//pinterest.com/pin/create/link/?url={0}","id":"63cf42f0-8fed-4b1c-acbe-0fe44811231d","allowedForAnonymousUsers":true,"type":"Social","displayName":"Pinterest","namePassedToEvents":"Pinterest","cssClassName":"atButtonPinterest","privacyOptOutMessage":"\u003cdiv class=\u0027privacyMessage\u0027\u003e\n\u003ch3\u003eThis feature is not available with your current cookie settings.\u003c/h3\u003e\n\u003cp\u003eYou can \u003ca href=\u0027#\u0027 data-show-preference-center=\u00271\u0027\u003eupdate your privacy settings\u003c/a\u003e to enable this content. Please enable “Functional Cookies” to use this feature.\u003c/p\u003e\n\u003c/div\u003e","showPrivacyOptOutMessage":false},{"addFavoriteErrorMessage":"Sorry, something went wrong. Please save again.","removeFavoriteErrorMessage":"Error occurred while removing from favorites","regAction":"FAVORITE","eSourceCode":14171,"isCurrentUserAnonymous":false,"isFavoriteItem":false,"id":"351369d5-f1b1-4a90-b495-16074575bb8a","allowedForAnonymousUsers":false,"type":"Favorite","displayName":"Save","namePassedToEvents":"Favorite","cssClassName":"atButtonFavorite","privacyOptOutMessage":"\u003cdiv class=\u0027privacyMessage\u0027\u003e\n\u003ch3\u003eThis feature is not available with your current cookie settings.\u003c/h3\u003e\n\u003cp\u003eYou can \u003ca href=\u0027#\u0027 data-show-preference-center=\u00271\u0027\u003eupdate your privacy settings\u003c/a\u003e to enable this content. Please enable “Functional Cookies” to use this feature.\u003c/p\u003e\n\u003c/div\u003e","showPrivacyOptOutMessage":false},{"providerName":"facebook","providerNamePassedToEvents":"Facebook","shareUrlFormat":"//facebook.com/sharer/sharer.php?u={0}","id":"6d176960-1afd-4a34-83b5-795429359551","allowedForAnonymousUsers":true,"type":"Social","displayName":"Facebook","namePassedToEvents":"Facebook","cssClassName":"atButtonFacebook","privacyOptOutMessage":"\u003cdiv class=\u0027privacyMessage\u0027\u003e\n\u003ch3\u003eThis feature is not available with your current cookie settings.\u003c/h3\u003e\n\u003cp\u003eYou can \u003ca href=\u0027#\u0027 data-show-preference-center=\u00271\u0027\u003eupdate your privacy settings\u003c/a\u003e to enable this content. Please enable “Functional Cookies” to use this feature.\u003c/p\u003e\n\u003c/div\u003e","showPrivacyOptOutMessage":false},{"templateId":"eb460499-2547-4f84-a197-60f31934a3b9","dialogHeading":"Email Article","emailCode":"PB_ContentEmail","dialogSettings":{"cancelButtonText":"Cancel","copyToSenderLabel":"Send a copy to myself","emailAddressesLabel":"* Email Address","emailInstructionText":"Separate email addresses with commas","fromText":"From:","privacyPolicyText":"\u003cp\u003e\u0026copy;2024 General Mills, Inc. All Rights Reserved. This information will only be used to send an email to your friend(s) and will not be saved. Please read our \u003ca rel=\u0022noopener noreferrer\u0022 rel=\u0022noopener noreferrer\u0022 href=\u0022http://www.generalmills.com/company/privacy-policies/privacy-policy-us\u0022 target=\u0022_blank\u0022 shape=\u0022rect\u0022\u003ePrivacy Policy\u003c/a\u003e.\u003c/p\u003e","requiredFieldText":"* Required","sendButtonText":"Send","senderEmailAddressLabel":"* Your Email Address","senderFirstNameLabel":"* Your First Name","sendToText":"Send To:"},"id":"2a5b12c8-299b-467d-812e-41e9a0afb70d","allowedForAnonymousUsers":true,"type":"Email","displayName":"Email","namePassedToEvents":"Email","cssClassName":"atButtonEmail","privacyOptOutMessage":"\u003cdiv class=\u0027privacyMessage\u0027\u003e\n\u003ch3\u003eThis feature is not available with your current cookie settings.\u003c/h3\u003e\n\u003cp\u003eYou can \u003ca href=\u0027#\u0027 data-show-preference-center=\u00271\u0027\u003eupdate your privacy settings\u003c/a\u003e to enable this content. Please enable “Functional Cookies” to use this feature.\u003c/p\u003e\n\u003c/div\u003e","showPrivacyOptOutMessage":false},{"layoutParameter":"p%3d1","id":"783fefb5-010a-4be1-b84d-f0447da7c52c","allowedForAnonymousUsers":true,"type":"Print","displayName":"Print","namePassedToEvents":"Print","cssClassName":"atButtonPrint","privacyOptOutMessage":"\u003cdiv class=\u0027privacyMessage\u0027\u003e\n\u003ch3\u003eThis feature is not available with your current cookie settings.\u003c/h3\u003e\n\u003cp\u003eYou can \u003ca href=\u0027#\u0027 data-show-preference-center=\u00271\u0027\u003eupdate your privacy settings\u003c/a\u003e to enable this content. Please enable “Functional Cookies” to use this feature.\u003c/p\u003e\n\u003c/div\u003e","showPrivacyOptOutMessage":false}],"isSticky":true},"userSettings":{"isCurrentUserAnonymous":true,"isFavoriteItem":false},"pageAttributes":{"url":"https%3a%2f%2fwww.pillsbury.com%2feveryday-eats%2fdinner-tonight%2fbest-ways-to-cook-foil-packs","contentId":"b866ea6a-379b-40d9-a1c4-a102057a0b47"},"recaptchaPublicKey":"6LceAigUAAAAAC8aIQvJ9yRpRl3r1ZBKbou-tIDe"};
var moduleName = 'actionToolbar';
var isVueModule = true;
GeneralMills.PandoSites.RegisterControlInstance(moduleName, configuration, componentMetadata, isVueModule)
});
})();
We’re calling it: Foil packs are the new go-to summer dinner. Whether you love the thrill of the grill, the ease of the oven, or cooking outdoors on a campfire, foil packs make mealtime simpler than ever—and the best part? There’s zero cleanup. Here are all the details on how to rock the season’s best-kept dinnertime secret.
Foil Packs are Perfect for Your Oven, Grill and Campfire
There are so many reasons to love the foil pack. Whether you want to bake an easy, mess-free dish in the oven; try a new method on the grill; or prepare a simple, all-in-one meal for the campfire, the foil pack is your friend. Here are a few reasons why we always fall for the foil pack:
1. The Food is Protected
Enclosing all the ingredients in foil, including foods that tend to drip or fall through grill grates or spill over the sides, avoids any messes on the bottom of your grill or oven. Stuffed chicken breasts, chopped vegetables or anything with cheese tends to cause trouble on the grill, but when wrapped in a foil pack, they become totally foolproof. Foil also can help prevent burning, so you can use fats besides vegetable oil, such as butter.
2. They Offer an Easy Introduction to Grilling
For folks who are new to using the grill, the foil pack is a great gateway option for cooking al fresco, as the foil offers a literal buffer between the food and the fire. Once assembled, cooking (or baking) foil packs is relatively stress-free, since they often serve as an all-in-one meal—save a garnish or two. And you don’t have to worry about brushing on more barbecue sauce or babysitting foods to keep them from burning.
3. They’re Amazing Multi-Taskers
You can fill foil packs with just about any type of food, from dinner to dessert. You can cook an entire meal in one pack, or serve foil-pack side dishes with your grilled steaks, burgers and hot dogs. There’s no need to jump back and forth between the kitchen and the grill to get different components of the meal done. Also, if you’re cooking multiple foods at once, you can use the foil as a built-in warming drawer while you complete the meal. And the best part? You can serve the food directly from the foil pack and throw it all away when you’re done, meaning there’s no cleanup necessary.
4. They Can Be “Made to Order”
Have a picky eater or two in your family, or someone with food allergies or preferences? The wonder of the foil pack is that they can be “made to order” per person. If one person doesn’t like barbecue sauce, you can leave it out of their foil pack. Or, if someone has food allergies or preferences, you can leave out or substitute the ingredients they don’t eat—without having to leave it out of everyone else’s meal, too. Just be sure to label the adapted foil pack(s) with a permanent marker on the foil so you know whose is whose.
How to Fill + Fold a Foil Pack
The first secret to success in cooking with foil packs is in the filling and folding of the pack itself. Thankfully, it’s easy to do, and follows the same general guidelines no matter what goes inside.
To start, cut one large sheet of heavy-duty foil per pack—about 18x12 inches works best. Always spray the foil with cooking spray. If you don’t have heavy-duty foil, use two stacked pieces of regular foil per pack.
Place the food in the center of each piece of foil. Make sure to place even amounts of the prepared food into each foil pack so they can cook evenly and in the same amount of time.
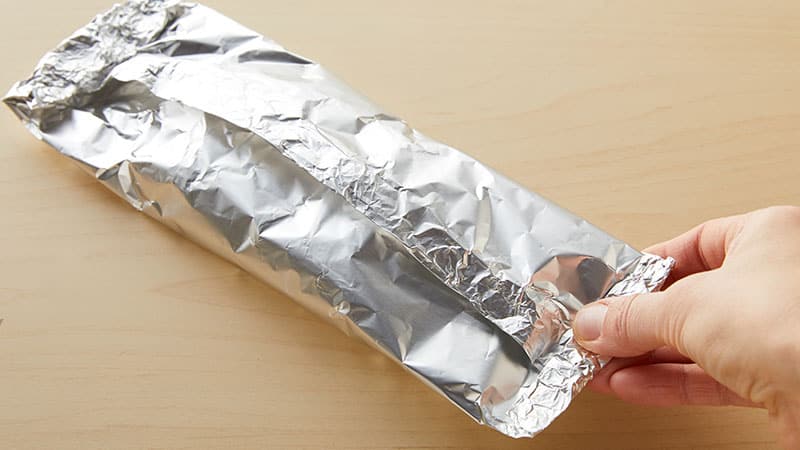
Bring up two sides of foil over the filling so the edges of the foil meet. Seal the edges, making a tight 1/2-inch fold. Fold again, allowing space on the sides for heat circulation and expansion. Fold the other sides to seal the pack.
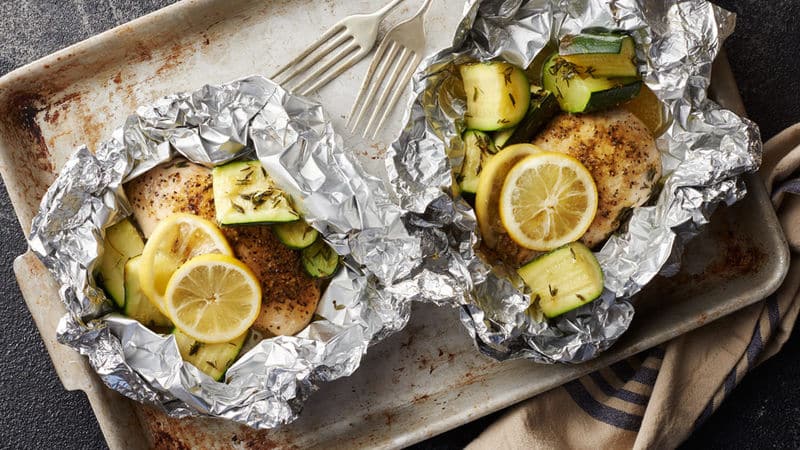
Foil Packs in the Oven
One of the easiest ways to cook foil packs is in the oven. Whether you want to bake an all-in-one meal, don’t have a grill or want to make dinner without making a mess, foil packs are a stress-free way to get food on the table.
In this recipe for BBQ Chicken Foil Packs, baking everything in a foil pack in the oven not only cuts down on cleanup, but keeps the food from burning or spilling out.
What You’ll Need:
- Heavy-duty foil
- Cooking spray
- Large cookie sheet
- Instant-read thermometer
Ingredients:
- 4 boneless skinless chicken breasts, cut into 1-inch pieces
- 2 cups barbecue sauce
- 2 cups drained pineapple tidbits
- 1 red bell pepper, diced
- 1 small red onion, diced
- Chopped fresh cilantro for garnish, if desired
1. Heat oven to 375°F. Cut four 18x12-inch sheets of heavy-duty foil. Arrange singly on a flat surface; spray generously with cooking spray.
2. In a medium bowl, stir chicken and barbecue sauce until well combined.
3. Divide chicken mixture evenly among prepared sheets of foil. Top evenly with pineapple, diced bell pepper and diced red onion.
4. Bring up two longer sides of one piece of foil so the edges meet. Seal the edges, making a tight 1/2-inch fold. Fold again, allowing space on the sides for heat circulation and expansion. Fold other sides to seal. Repeat with remaining foil. Place all foil packs on cookie sheet.
5. Bake 35-40 minutes until cooked through or when juice of chicken is clear when thickest part is cut (at least 165˚F).
6. Garnish with cilantro, if desired.
Get Recipe: BBQ Chicken Foil Packs
How to Test Foil Packs for Doneness
Before baking, write an “X” in permanent marker on the foil pack with the largest piece of meat or vegetable. To test foil packs for doneness, open the pack with the “X” on it just slightly, and insert an instant-read thermometer into the center of the meat. When it comes to chicken, generally speaking the temperature should read 165˚F when it’s fully cooked through; for ground meats, the temperature should read 160˚F. For a complete guide on doneness temperatures, refer to the USDA guidelines. To test vegetables for doneness, use a paring knife and cut slightly into the largest, densest vegetable (such as a potato); the vegetable should be tender.
How to Convert Grilled Foil Pack Recipes to the Oven
Most of our recipes offer instructions for cooking foil packs on both the grill or in the oven. But in some cases, the recipe only calls for the grilling method and, if you don’t own a grill, this could pose a problem. Thankfully, it’s easy to convert a recipe from the grill method to the oven.
To do so, assemble the foil packs as directed, then place them on a large cookie sheet. If the recipe calls for grilling over medium heat, bake the foil packs in the oven at 375˚F for approximately 1 1/2 to 2 times as long as called for in the grilled versions (e.g., if a recipe calls for grilling the foil packs for 20 minutes, bake them in the oven for at least 30-40 minutes).
It’s fairly safe to convert a foil pack recipe from the grill method to the oven method; however, converting from oven to grill is a little trickier. Because recipes developed for the oven method likely include ingredients or methods that don’t stand up as well to the intense direct heat of the grill, it’s best to follow the original method instructions for the recipe and bake the foil packs in the oven.
Here are some of our favorite foil pack recipes to make in the oven:
Foil Packs on the Grill
If you’re a seasoned grilling pro or want to ease your way into mastering the grill, foil packs are a great mealtime option. Since the food is wrapped up in foil, it’s naturally protected from the direct heat of the grill and eliminates the risk of smaller foods falling through the grates. Foil packs also keep your grill grates from getting dirty after cooking—no cleanup needed!
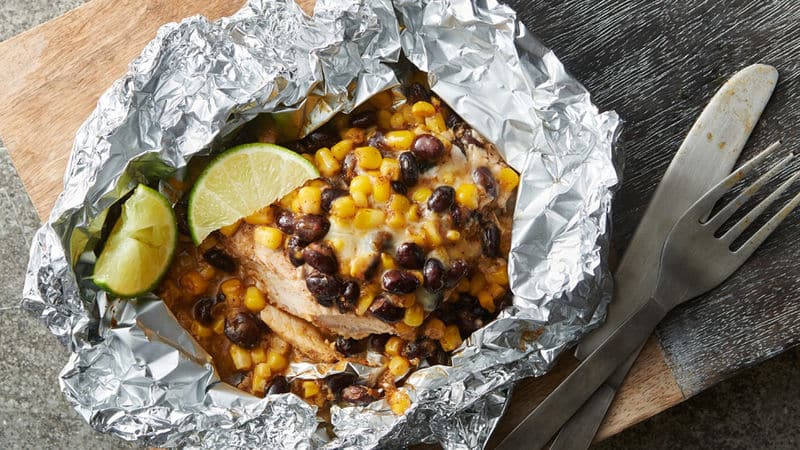
In this recipe for Southwest Pork Chop Foil Packs, pork chops are topped with a zesty black bean-corn salsa and shredded cheese and everything cooks in the foil pack on the grill for minimum stress, maximum results.
What You’ll Need:
- Heavy-duty foil
- Cooking spray
- Large cookie sheet
- Grill tongs
- Instant-read thermometer
Ingredients:
- 1 can (15 oz) Progresso™ black beans, drained, rinsed
- 1 1/2 cups Cascadian Farm™ organic frozen sweet corn, thawed
- 1/2 cup salsa verde
- 2 teaspoons chili powder
- 1 teaspoon ground cumin
- 4 boneless pork chops (5 to 7 oz each), 3/4 to 1 inch thick
- 1/4 teaspoon salt
- 1 cup shredded pepper Jack cheese
- Lime wedges, if desired
1. Heat a gas or charcoal grill to medium heat. Cut four (18x12-inch) sheets of heavy-duty foil. Arrange singly on a flat surface; spray generously with cooking spray.
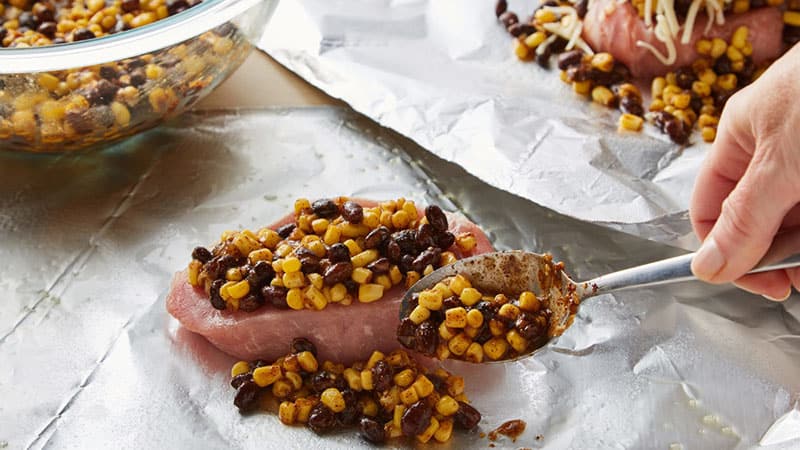
2. In a small bowl, stir together black beans, frozen corn, salsa verde, chili powder and cumin. Sprinkle pork chops with salt; place one in center of each sheet of foil. Spoon black bean mixture evenly on top of and around each pork chop. Top each pork chop with 1/4 cup cheese.
3. Bring up two longer sides of one piece of foil so the edges meet. Seal the edges, making a tight 1/2-inch fold. Fold again, allowing space on the sides for heat circulation and expansion. Fold other sides to seal. Repeat with remaining foil. Place all foil packs on cookie sheet to transfer to grill.
4. Place packs on grill over medium heat. Cover grill; cook 10 minutes. Using grill tongs, rotate packs 1/2 turn; cook 5-8 minutes more or until pork is no longer pink and an instant-read thermometer inserted into the center of the largest pork chop reads at least 145˚F.
5. Remove packs from grill. Carefully fold back foil. Garnish with lime slices, if desired.
Expert tip: Be careful of steam! Carefully open one end of each foil pack first to allow steam to escape when cooking is complete. Then open the top of the foil pack and enjoy.
Get Recipe: Southwest Pork Chop Foil Packs
Here are some of our favorite foil pack recipes to make on the grill:
Campfire Foil Packs
Whether you’re camping, at the cabin, or just craving a cookout by the bonfire, campfire foil packs are a fun way to make a full dinner without the mess or stress. Here are a few tips for converting foil pack recipes from the grill to the campfire:
- Try to mimic the conditions of a grill on the campfire: Use a portable grill grate or vegetable grill basket to create a flat surface for the foil packs to rest on while cooking.
- Since there isn’t a lid on a campfire and, in most cases, the foil packs will be closer to the flames than they would be on a grill, use grill tongs to turn the packs often to avoid burning.
- When it comes to what type of foil pack to cook, choose carefully. The campfire is great for cooking foil packs that include precooked protein like kielbasa and denser vegetables like potatoes. However, it’s not the best or safest method for cooking foil packs that contain raw meats or ingredients that can introduce complication, such as rice and broth.
What to Cook in a Foil Pack
What’s great about foil packs is you can cook a wide variety of foods in them, including chicken, pork, beef, fish and vegetables. As a general rule of thumb, choose meats and vegetables that taste great when steamed. While cooking a foil pack dinner on the grill or in the oven does often render more flavor than traditional steaming, it won’t give you that great sear that makes, for example, a juicy ribeye more appetizing.
Best Proteins to Cook in a Foil Pack
Here are some of our favorite protein options to place in a foil pack:
- Kielbasa and other precooked sausages
- Boneless, skinless chicken breasts
- Boneless, skinless chicken thighs
- Thin, boneless pork chops
- Burgers and meatballs
Best Vegetables to Cook in a Foil Pack
Here are some of our favorite vegetable/non-protein options to place in a foil pack:
- New or fingerling potatoes
- Bell peppers
- Carrots
- Broccoli
- Corn on the cob
- Red onions
- Green onions
- Cherry tomatoes
What Not to Cook in a Foil Pack
As far as what not to cook in a foil pack, here are a few proteins and vegetables we recommend avoiding:
- Button mushrooms, as they tend to release too much liquid
- Tender herbs, such as parsley or cilantro (these are best sprinkled on top after cooking as a garnish!)
- Any cut of steak, as you won’t get that appetizing sear on the outside
Expert tip: Be mindful that watery vegetables such as zucchini, squash or tomatoes will release a lot of liquid during cooking, as will raw meats such as chicken or pork chops. Pair them with starchier, heartier vegetables and be sure to seal the foil packs as tightly as possible to avoid leakage.
Our Favorite Foil Pack Recipes
If the idea of coming up with your own foil pack recipe is frightening, don’t worry! We have plenty of well-loved and well-tested foil pack recipes on Pillsbury.com to choose from:
Tips for the Best Foil Packs
Now that you know how to rock foil packs, we have a few more tips to help you get the most foolproof, delicious foil packs to your table.
Keep Foil-Pack Fillings Fairly Dry
Use only as much liquid and/or fat–such as water, broth or oil—in your foil packs as necessary. Since the packs are sealed, there’s nowhere for the liquid to go, and while some liquids may cook down from the high heat within the packs, most of the time the liquid will stay put. If too much is used, it could leave you with a sad, soggy meal. When making foil packs that require liquid, such as foil packs with rice, measure the ingredients accurately and use only the amount of liquid called for in the recipe.
Select Similar-Size Pieces
When cooking pieces of meat or vegetables, choose pieces that are similar in size. Alternatively, you can trim larger pieces of meat to match the size of smaller ones, and chop vegetables in equal-size pieces.
Keep In the Heat
Whether grilling or baking, foil packs thrive on constant heat to cook. Keep the grill lid on, the oven door closed and the foil packs sealed as much as possible. When opening the grill to rotate the packs, move quickly, and when testing a foil pack for doneness, transfer the foil pack to a plate and close the grill or oven door quickly. (Also, check for doneness quickly!)
Garnishes Make the Meal
As far as foil packs go, garnishes and toppings are what really bring the meal together, both in flavor and appearance. Add a squeeze of lime juice, sprinkle on extra cheese or scatter chopped herbs on top. These are simple but easy ways to elevate the foil pack dinner even after it’s been cooked.
(function() {
document.addEventListener('DOMContentLoaded', function() {
var componentMetadata = JSON.parse('\x7b\x22componentName\x22\x3a\x22ConsumerGeneratedContent_b866ea6a-379b-40d9-a1c4-a102057a0b47\x22,\x22deferOptions\x22\x3a\x7b\x22deferComponent\x22\x3atrue,\x22deferType\x22\x3a\x22OnDemand\x22,\x22deferId\x22\x3a\x22rc491b6ad32f844e6a374e30eec596308\x22,\x22deferredContainerId\x22\x3a\x22\x2fratingReview\x2finteropRatingReview\x22,\x22deferredContainerView\x22\x3a\x22InteropDeferWrapper\x22\x7d,\x22viewName\x22\x3a\x22ConsumerGeneratedContent\x22\x7d');
var configuration = {"loaderScript":"https://apps.bazaarvoice.com/deployments/pillsbury-en_us/main_site/production/en_US/bv.js","type":"QuestionAndAnswer","language":"en","includeRatings":false};
var moduleName = 'consumerGeneratedContent';
var isVueModule = true;
GeneralMills.PandoSites.RegisterControlInstance(moduleName, configuration, componentMetadata, isVueModule)
});
})();