(function() {
document.addEventListener('DOMContentLoaded', function() {
var componentMetadata = JSON.parse('\x7b\x22componentName\x22\x3a\x22UserLinks_e8af84a8-5198-47ca-bc1c-daf22247ecf7\x22,\x22deferOptions\x22\x3a\x7b\x22deferComponent\x22\x3afalse,\x22deferType\x22\x3a\x22None\x22,\x22deferId\x22\x3a\x22r6dca5837e35a4081955a7b5e2b5df27e\x22,\x22deferredContainerId\x22\x3anull,\x22deferredContainerView\x22\x3anull\x7d,\x22viewName\x22\x3a\x22UserLinks\x22\x7d');
var configuration = {"isKnown":false,"favoritesCount":0,"joinNowText":"Sign Up","joinNowEsrcCode":"14171","joinNowRegAction":"HEADERJOINLOGIN","loginText":"Log In","loginEsrcCode":"14171","loginRegAction":"HEADERJOINLOGIN","myAccountText":"My Account","settingsText":"Manage","logOutText":"Log Out","returnUrl":"%2frecipes%2fperfect-apple-pie%2f1fc2b60f-0a4f-441e-ad93-8bbd00fe5334%3fwt.mc_id%3dpaid_bannerad_4771137_997356%26sc%3d15835"};
var moduleName = 'userLinks';
var isVueModule = true;
GeneralMills.PandoSites.RegisterControlInstance(moduleName, configuration, componentMetadata, isVueModule)
});
})();
(function() {
document.addEventListener('DOMContentLoaded', function() {
var componentMetadata = JSON.parse('\x7b\x22componentName\x22\x3a\x22TargetedNavigation_e8af84a8-5198-47ca-bc1c-daf22247ecf7\x22,\x22deferOptions\x22\x3a\x7b\x22deferComponent\x22\x3afalse,\x22deferType\x22\x3a\x22None\x22,\x22deferId\x22\x3a\x22r21eed03634714c52a6650a424071118e\x22,\x22deferredContainerId\x22\x3anull,\x22deferredContainerView\x22\x3anull\x7d,\x22viewName\x22\x3a\x22TargetedNavigation\x22\x7d');
var configuration = {};
var moduleName = 'targetedNav';
var isVueModule = false;
GeneralMills.PandoSites.RegisterControlInstance(moduleName, configuration, componentMetadata, isVueModule)
});
})();
(function() {
document.addEventListener('DOMContentLoaded', function() {
var componentMetadata = JSON.parse('\x7b\x22componentName\x22\x3a\x22SearchBox_e8af84a8-5198-47ca-bc1c-daf22247ecf7\x22,\x22deferOptions\x22\x3a\x7b\x22deferComponent\x22\x3afalse,\x22deferType\x22\x3a\x22None\x22,\x22deferId\x22\x3a\x22r8919124cbdde468c89889a9af14a8c29\x22,\x22deferredContainerId\x22\x3anull,\x22deferredContainerView\x22\x3anull\x7d,\x22viewName\x22\x3a\x22SearchBox\x22\x7d');
var configuration = {"searchDefaultText":"What do you want to make today?","searchProcessingMessage":"Please Wait..","searchLinkButtonText":"","searchLinkButtonToolTip":"Search","headerSearchBoxTitle":"Search","searchBoxTitle":"","autocompleteSearchPath":"/search","autocompleteSuggestionLimit":10,"minimumSearchHintCharacters":3,"language":"en","id":"15471cfa-32ab-4f24-9a0f-c3fedbbd66ff","enableSearchTerms":true,"contentTypeFilter":"","dataSourceId":"35b4474e-0aa6-4b63-92bc-e950b5c2ada8"};
var moduleName = 'searchBox';
var isVueModule = true;
GeneralMills.PandoSites.RegisterControlInstance(moduleName, configuration, componentMetadata, isVueModule)
});
})();
(function() {
document.addEventListener('DOMContentLoaded', function() {
var componentMetadata = JSON.parse('\x7b\x22componentName\x22\x3a\x22RatingAndReviewCounts_e8af84a8-5198-47ca-bc1c-daf22247ecf7\x22,\x22deferOptions\x22\x3a\x7b\x22deferComponent\x22\x3afalse,\x22deferType\x22\x3a\x22None\x22,\x22deferId\x22\x3a\x22r58334015b3654134b4bfd9ef9001de87\x22,\x22deferredContainerId\x22\x3a\x22\x2fmain\x2frdpRatingAndReview\x22,\x22deferredContainerView\x22\x3anull\x7d,\x22viewName\x22\x3a\x22RatingAndReviewCounts\x22\x7d');
var configuration = {};
var moduleName = 'ratingAndReviewCounts';
var isVueModule = false;
GeneralMills.PandoSites.RegisterControlInstance(moduleName, configuration, componentMetadata, isVueModule)
});
})();
Save Recipe
(function() {
document.addEventListener('DOMContentLoaded', function() {
var componentMetadata = JSON.parse('\x7b\x22componentName\x22\x3a\x22ActionToolbar_54e6f361-54b7-493c-a3f6-899e08a2e456\x22,\x22deferOptions\x22\x3a\x7b\x22deferComponent\x22\x3afalse,\x22deferType\x22\x3a\x22None\x22,\x22deferId\x22\x3a\x22r9462ba1c9ccd46c4ac9bb7ae3d9e385a\x22,\x22deferredContainerId\x22\x3a\x22\x2fmain\x2finlineActionToolbarMobile\x22,\x22deferredContainerView\x22\x3anull\x7d,\x22viewName\x22\x3a\x22ActionToolbar\x22\x7d');
var configuration = {"contentId":"1fc2b60f-0a4f-441e-ad93-8bbd00fe5334","toolbarSettings":{"id":"54e6f361-54b7-493c-a3f6-899e08a2e456","registrationUrl":"/GMI/CoreSites/PB/Home/register/reg-fp","regAction":"FAVORITE","eSourceCode":11275,"namePassedToEvents":"RDPToolbarBODY","buttons":[{"addFavoriteErrorMessage":"Sorry, something went wrong. Please save again.","removeFavoriteErrorMessage":"Error occurred while removing from favorites","registrationUrl":"/GMI/CoreSites/PB/Home/register/reg-fp","regAction":"FAVORITE","eSourceCode":11275,"isCurrentUserAnonymous":false,"isFavoriteItem":false,"id":"3f2f45db-633c-4198-aa86-3b916997c539","allowedForAnonymousUsers":false,"type":"Favorite","displayName":"Save Recipe","namePassedToEvents":"Favorite","cssClassName":"atButtonFavorite","privacyOptOutMessage":"\u003cdiv class=\u0027privacyMessage\u0027\u003e\n\u003ch3\u003eThis feature is not available with your current cookie settings.\u003c/h3\u003e\n\u003cp\u003eYou can \u003ca href=\u0027#\u0027 data-show-preference-center=\u00271\u0027\u003eupdate your privacy settings\u003c/a\u003e to enable this content. Please enable “Functional Cookies” to use this feature.\u003c/p\u003e\n\u003c/div\u003e","showPrivacyOptOutMessage":false},{"providerName":"pinterest","providerNamePassedToEvents":"Pinterest","shareUrlFormat":"//pinterest.com/pin/create/link/?url={0}","id":"f3e30ca4-da79-4842-8b1d-209ce34f733f","allowedForAnonymousUsers":true,"type":"Social","displayName":"Pinterest","namePassedToEvents":"Pinterest","cssClassName":"atButtonPinterest","privacyOptOutMessage":"\u003cdiv class=\u0027privacyMessage\u0027\u003e\n\u003ch3\u003eThis feature is not available with your current cookie settings.\u003c/h3\u003e\n\u003cp\u003eYou can \u003ca href=\u0027#\u0027 data-show-preference-center=\u00271\u0027\u003eupdate your privacy settings\u003c/a\u003e to enable this content. Please enable “Functional Cookies” to use this feature.\u003c/p\u003e\n\u003c/div\u003e","showPrivacyOptOutMessage":false},{"providerName":"facebook","providerNamePassedToEvents":"Facebook","shareUrlFormat":"//facebook.com/sharer/sharer.php?u={0}","id":"e81fd2b5-a56f-46e8-8cf7-ec03e6a8d023","allowedForAnonymousUsers":true,"type":"Social","displayName":"Facebook","namePassedToEvents":"Facebook","cssClassName":"atButtonFacebook","privacyOptOutMessage":"\u003cdiv class=\u0027privacyMessage\u0027\u003e\n\u003ch3\u003eThis feature is not available with your current cookie settings.\u003c/h3\u003e\n\u003cp\u003eYou can \u003ca href=\u0027#\u0027 data-show-preference-center=\u00271\u0027\u003eupdate your privacy settings\u003c/a\u003e to enable this content. Please enable “Functional Cookies” to use this feature.\u003c/p\u003e\n\u003c/div\u003e","showPrivacyOptOutMessage":false},{"templateId":"25dd0d5d-57f4-47c6-a2e1-4de692d643eb","dialogHeading":"Email Recipe","emailCode":"PB_ContentEmail","dialogSettings":{"cancelButtonText":"Cancel","copyToSenderLabel":"Send a copy to myself","emailAddressesLabel":"* Email Address","emailInstructionText":"Separate email addresses with commas","fromText":"From:","privacyPolicyText":"\u003cp\u003e\u0026copy;2024 General Mills, Inc. All Rights Reserved. This information will only be used to send an email to your friend(s) and will not be saved. Please read our \u003ca rel=\u0022noopener noreferrer\u0022 rel=\u0022noopener noreferrer\u0022 href=\u0022http://www.generalmills.com/company/privacy-policies/privacy-policy-us\u0022 target=\u0022_blank\u0022 shape=\u0022rect\u0022\u003ePrivacy Policy\u003c/a\u003e.\u003c/p\u003e","requiredFieldText":"* Required","sendButtonText":"Send","senderEmailAddressLabel":"* Your Email Address","senderFirstNameLabel":"* Your First Name","sendToText":"Send To:"},"id":"b0f363cb-0754-4105-9112-52fcb7e2c639","allowedForAnonymousUsers":true,"type":"Email","displayName":"Email","namePassedToEvents":"Email","cssClassName":"atButtonEmail","privacyOptOutMessage":"\u003cdiv class=\u0027privacyMessage\u0027\u003e\n\u003ch3\u003eThis feature is not available with your current cookie settings.\u003c/h3\u003e\n\u003cp\u003eYou can \u003ca href=\u0027#\u0027 data-show-preference-center=\u00271\u0027\u003eupdate your privacy settings\u003c/a\u003e to enable this content. Please enable “Functional Cookies” to use this feature.\u003c/p\u003e\n\u003c/div\u003e","showPrivacyOptOutMessage":false}],"isSticky":false},"userSettings":{"isCurrentUserAnonymous":true,"isFavoriteItem":false},"pageAttributes":{"url":"https%3a%2f%2fwww.pillsbury.com%2frecipes%2fperfect-apple-pie%2f1fc2b60f-0a4f-441e-ad93-8bbd00fe5334%3fwt.mc_id%3dpaid_bannerad_4771137_997356%26sc%3d15835","contentId":"1fc2b60f-0a4f-441e-ad93-8bbd00fe5334"},"recaptchaPublicKey":"6LceAigUAAAAAC8aIQvJ9yRpRl3r1ZBKbou-tIDe"};
var moduleName = 'actionToolbar';
var isVueModule = true;
GeneralMills.PandoSites.RegisterControlInstance(moduleName, configuration, componentMetadata, isVueModule)
});
})();
(function() {
document.addEventListener('DOMContentLoaded', function() {
var componentMetadata = JSON.parse('\x7b\x22componentName\x22\x3a\x22VideoOverlay_e8af84a8-5198-47ca-bc1c-daf22247ecf7\x22,\x22deferOptions\x22\x3a\x7b\x22deferComponent\x22\x3afalse,\x22deferType\x22\x3a\x22None\x22,\x22deferId\x22\x3a\x22ra735edbdee2a49098561431a35148c78\x22,\x22deferredContainerId\x22\x3a\x22\x2fmain\x2frdpImage\x22,\x22deferredContainerView\x22\x3anull\x7d,\x22viewName\x22\x3a\x22VideoOverlay\x22\x7d');
var configuration = {"id":"rIIYB-cg26s","name":"How to Make Perfect Apple Pie","aspectRatioPercent":56.2500,"autoplay":true,"playButtonText":"Watch Video","loadingImageUrl":"/-/media/GMI/Core-Sites/PB/PB/Images/Shared/YouTube/loading.gif?sc_lang=en","loadingImageAltText":"Loading","privacyScreenContent":"\u003cdiv class=\u0022privacyMessage\u0022\u003e\n\u003ch3\u003eThis feature is not available with your current cookie settings.\u003c/h3\u003e\n\u003cp\u003eYou can \u003ca href=\u0022#\u0022 data-show-preference-center=\u00221\u0022\u003eupdate your privacy settings\u003c/a\u003e to enable this content. Please enable all cookies to use this feature.\u003c/p\u003e\n\u003c/div\u003e"};
var moduleName = 'videoOverlay';
var isVueModule = true;
GeneralMills.PandoSites.RegisterControlInstance(moduleName, configuration, componentMetadata, isVueModule)
});
})();
Prep 30min
Total3hr0min
Ingredients8
Servings8
(function() {
document.addEventListener('DOMContentLoaded', function() {
var componentMetadata = JSON.parse('\x7b\x22componentName\x22\x3a\x22ThirdPartyScript_dae1ab9f-d286-4125-bf30-b7695b6641fe\x22,\x22deferOptions\x22\x3a\x7b\x22deferComponent\x22\x3atrue,\x22deferType\x22\x3a\x22OnDemand\x22,\x22deferId\x22\x3a\x22r5e4b17494e14485488cec19d19951f12\x22,\x22deferredContainerId\x22\x3a\x22\x2fmain\x2frdpBuyNowTop\x22,\x22deferredContainerView\x22\x3a\x22ThirdPartyScript\x22\x7d,\x22viewName\x22\x3a\x22ThirdPartyScript\x22\x7d');
var configuration = {"placeholderName":"rdpBuyNowTop","domContent":"\u003cdiv id=\u0022whisk-target-container-rdp-top\u0022\u003e\u003c/div\u003e","scriptContent":"https://cdn.whisk.com/sdk/shopping-list.js","onLoadScript":"var whisk = window.whisk || {};\r\nwhisk.queue = whisk.queue || [];\r\nvar whiskViewEventHasFired = window.whiskViewEventHasFired || false;\r\n\r\nvar whiskcontainer = document.getElementById(\u0022whisk-target-container-rdp-top\u0022);\r\nif (whiskcontainer != null) {\r\n //whiskcontainer.setAttribute(\u0022id\u0022, \u0022whisk-ingredients-id\u0022);\r\n\r\n whisk.queue.push(function () {\r\n whisk.shoppingList.defineWidget(\u0022whisk-target-container-rdp-top\u0022, {\r\n trackingId: \u0022wx-75324683-bf8a0d24\u0022, // social share bar button\r\n whiteLabel: \u0022pillsbury\u0022\r\n });\r\n\r\n\r\n whisk.events.subscribe(\u0022whisk-target-container-rdp-top\u0022, \u0022view\u0022, function (type, data) {\r\n // your code on widget view\r\n if (!whiskViewEventHasFired) {\r\n whiskViewEventHasFired = true;\r\n GeneralMills.Analytics.raiseEvent({\r\n EventType: \u0022Buy_view\u0022,\r\n VendorExperience: \u0022Whisk_recipe\u0022\r\n });\r\n }\r\n });\r\n\r\n\r\n whisk.events.subscribe(\u0022whisk-target-container-rdp-top\u0022, \u0022click\u0022, function (type, data) {\r\n // your code on widget click\r\n GeneralMills.Analytics.raiseEvent({\r\n EventType: \u0022Buy_click\u0022,\r\n Position: \u0022Inline Toolbar\u0022,\r\n VendorExperience: \u0022Whisk_recipe\u0022\r\n });\r\n });\r\n\r\n });\r\n\r\n whisk.queue.push(function () {\r\n whisk.display(\u0022whisk-target-container-rdp-top\u0022);\r\n });\r\n}"};
var moduleName = 'thirdPartyScript';
var isVueModule = true;
GeneralMills.PandoSites.RegisterControlInstance(moduleName, configuration, componentMetadata, isVueModule)
});
})();
Save
Print
Pinterest
Facebook
Email
(function() {
document.addEventListener('DOMContentLoaded', function() {
var componentMetadata = JSON.parse('\x7b\x22componentName\x22\x3a\x22ActionToolbar_a83c5fda-5921-40ec-b87a-8f5097489f6c\x22,\x22deferOptions\x22\x3a\x7b\x22deferComponent\x22\x3afalse,\x22deferType\x22\x3a\x22None\x22,\x22deferId\x22\x3a\x22rf942ecaf4ffe4a41b0576ea2ef7f6f29\x22,\x22deferredContainerId\x22\x3a\x22\x2fmain\x2finlineActionToolbarDesktop\x22,\x22deferredContainerView\x22\x3anull\x7d,\x22viewName\x22\x3a\x22ActionToolbar\x22\x7d');
var configuration = {"contentId":"1fc2b60f-0a4f-441e-ad93-8bbd00fe5334","toolbarSettings":{"id":"a83c5fda-5921-40ec-b87a-8f5097489f6c","registrationUrl":"/GMI/CoreSites/PB/Home/register/reg-fp","regAction":"FAVORITE","eSourceCode":11275,"namePassedToEvents":"RDPToolbarBODY","buttons":[{"addFavoriteErrorMessage":"Sorry, something went wrong. Please save again.","removeFavoriteErrorMessage":"Error occurred while removing from favorites","registrationUrl":"/GMI/CoreSites/PB/Home/register/reg-fp","regAction":"FAVORITE","eSourceCode":11275,"isCurrentUserAnonymous":false,"isFavoriteItem":false,"id":"351369d5-f1b1-4a90-b495-16074575bb8a","allowedForAnonymousUsers":false,"type":"Favorite","displayName":"Save","namePassedToEvents":"Favorite","cssClassName":"atButtonFavorite","privacyOptOutMessage":"\u003cdiv class=\u0027privacyMessage\u0027\u003e\n\u003ch3\u003eThis feature is not available with your current cookie settings.\u003c/h3\u003e\n\u003cp\u003eYou can \u003ca href=\u0027#\u0027 data-show-preference-center=\u00271\u0027\u003eupdate your privacy settings\u003c/a\u003e to enable this content. Please enable “Functional Cookies” to use this feature.\u003c/p\u003e\n\u003c/div\u003e","showPrivacyOptOutMessage":false},{"layoutParameter":"p%3d1","id":"783fefb5-010a-4be1-b84d-f0447da7c52c","allowedForAnonymousUsers":true,"type":"Print","displayName":"Print","namePassedToEvents":"Print","cssClassName":"atButtonPrint","privacyOptOutMessage":"\u003cdiv class=\u0027privacyMessage\u0027\u003e\n\u003ch3\u003eThis feature is not available with your current cookie settings.\u003c/h3\u003e\n\u003cp\u003eYou can \u003ca href=\u0027#\u0027 data-show-preference-center=\u00271\u0027\u003eupdate your privacy settings\u003c/a\u003e to enable this content. Please enable “Functional Cookies” to use this feature.\u003c/p\u003e\n\u003c/div\u003e","showPrivacyOptOutMessage":false},{"providerName":"pinterest","providerNamePassedToEvents":"Pinterest","shareUrlFormat":"//pinterest.com/pin/create/link/?url={0}","id":"63cf42f0-8fed-4b1c-acbe-0fe44811231d","allowedForAnonymousUsers":true,"type":"Social","displayName":"Pinterest","namePassedToEvents":"Pinterest","cssClassName":"atButtonPinterest","privacyOptOutMessage":"\u003cdiv class=\u0027privacyMessage\u0027\u003e\n\u003ch3\u003eThis feature is not available with your current cookie settings.\u003c/h3\u003e\n\u003cp\u003eYou can \u003ca href=\u0027#\u0027 data-show-preference-center=\u00271\u0027\u003eupdate your privacy settings\u003c/a\u003e to enable this content. Please enable “Functional Cookies” to use this feature.\u003c/p\u003e\n\u003c/div\u003e","showPrivacyOptOutMessage":false},{"providerName":"facebook","providerNamePassedToEvents":"Facebook","shareUrlFormat":"//facebook.com/sharer/sharer.php?u={0}","id":"6d176960-1afd-4a34-83b5-795429359551","allowedForAnonymousUsers":true,"type":"Social","displayName":"Facebook","namePassedToEvents":"Facebook","cssClassName":"atButtonFacebook","privacyOptOutMessage":"\u003cdiv class=\u0027privacyMessage\u0027\u003e\n\u003ch3\u003eThis feature is not available with your current cookie settings.\u003c/h3\u003e\n\u003cp\u003eYou can \u003ca href=\u0027#\u0027 data-show-preference-center=\u00271\u0027\u003eupdate your privacy settings\u003c/a\u003e to enable this content. Please enable “Functional Cookies” to use this feature.\u003c/p\u003e\n\u003c/div\u003e","showPrivacyOptOutMessage":false},{"templateId":"25dd0d5d-57f4-47c6-a2e1-4de692d643eb","dialogHeading":"Email Recipe","emailCode":"PB_ContentEmail","dialogSettings":{"cancelButtonText":"Cancel","copyToSenderLabel":"Send a copy to myself","emailAddressesLabel":"* Email Address","emailInstructionText":"Separate email addresses with commas","fromText":"From:","privacyPolicyText":"\u003cp\u003e\u0026copy;2024 General Mills, Inc. All Rights Reserved. This information will only be used to send an email to your friend(s) and will not be saved. Please read our \u003ca rel=\u0022noopener noreferrer\u0022 rel=\u0022noopener noreferrer\u0022 href=\u0022http://www.generalmills.com/company/privacy-policies/privacy-policy-us\u0022 target=\u0022_blank\u0022 shape=\u0022rect\u0022\u003ePrivacy Policy\u003c/a\u003e.\u003c/p\u003e","requiredFieldText":"* Required","sendButtonText":"Send","senderEmailAddressLabel":"* Your Email Address","senderFirstNameLabel":"* Your First Name","sendToText":"Send To:"},"id":"c2c657e7-baa7-4952-8b5d-4adff90b4a1b","allowedForAnonymousUsers":true,"type":"Email","displayName":"Email","namePassedToEvents":"Email","cssClassName":"atButtonEmail","privacyOptOutMessage":"\u003cdiv class=\u0027privacyMessage\u0027\u003e\n\u003ch3\u003eThis feature is not available with your current cookie settings.\u003c/h3\u003e\n\u003cp\u003eYou can \u003ca href=\u0027#\u0027 data-show-preference-center=\u00271\u0027\u003eupdate your privacy settings\u003c/a\u003e to enable this content. Please enable “Functional Cookies” to use this feature.\u003c/p\u003e\n\u003c/div\u003e","showPrivacyOptOutMessage":false}],"isSticky":false},"userSettings":{"isCurrentUserAnonymous":true,"isFavoriteItem":false},"pageAttributes":{"url":"https%3a%2f%2fwww.pillsbury.com%2frecipes%2fperfect-apple-pie%2f1fc2b60f-0a4f-441e-ad93-8bbd00fe5334%3fwt.mc_id%3dpaid_bannerad_4771137_997356%26sc%3d15835","contentId":"1fc2b60f-0a4f-441e-ad93-8bbd00fe5334"},"recaptchaPublicKey":"6LceAigUAAAAAC8aIQvJ9yRpRl3r1ZBKbou-tIDe"};
var moduleName = 'actionToolbar';
var isVueModule = true;
GeneralMills.PandoSites.RegisterControlInstance(moduleName, configuration, componentMetadata, isVueModule)
});
})();
(function() {
document.addEventListener('DOMContentLoaded', function() {
var componentMetadata = JSON.parse('\x7b\x22componentName\x22\x3a\x22WakeLock_e8af84a8-5198-47ca-bc1c-daf22247ecf7\x22,\x22deferOptions\x22\x3a\x7b\x22deferComponent\x22\x3afalse,\x22deferType\x22\x3a\x22None\x22,\x22deferId\x22\x3a\x22r06db370c19ee4bf19b2d71275af4e8ce\x22,\x22deferredContainerId\x22\x3a\x22\x2fmain\x2frdpWakeLockTop\x22,\x22deferredContainerView\x22\x3anull\x7d,\x22viewName\x22\x3a\x22WakeLock\x22\x7d');
var configuration = {"heading":"Ready to make?","button":{"errorMessage":"","id":"f9fa8e1c-2dc5-4470-8ca2-83ff8bd5ffd2","allowedForAnonymousUsers":true,"type":"WakeLock","displayName":"Keep Screen On","namePassedToEvents":"Wakelock","cssClassName":"atButtonWakeLock","privacyOptOutMessage":"\u003cdiv class=\u0027privacyMessage\u0027\u003e\n\u003ch3\u003eThis feature is not available with your current cookie settings.\u003c/h3\u003e\n\u003cp\u003eYou can \u003ca href=\u0027#\u0027 data-show-preference-center=\u00271\u0027\u003eupdate your privacy settings\u003c/a\u003e to enable this content. Please enable “Functional Cookies” to use this feature.\u003c/p\u003e\n\u003c/div\u003e","showPrivacyOptOutMessage":false}};
var moduleName = 'wakeLockShared';
var isVueModule = true;
GeneralMills.PandoSites.RegisterControlInstance(moduleName, configuration, componentMetadata, isVueModule)
});
})();
Save
Shop
Share
Keep Screen On
(function() {
document.addEventListener('DOMContentLoaded', function() {
var componentMetadata = JSON.parse('\x7b\x22componentName\x22\x3a\x22ActionToolbar_73c8fdfd-5ac3-49e5-81ef-20637924c32d\x22,\x22deferOptions\x22\x3a\x7b\x22deferComponent\x22\x3afalse,\x22deferType\x22\x3a\x22None\x22,\x22deferId\x22\x3a\x22r177a70935c814535b96c2fff07d03377\x22,\x22deferredContainerId\x22\x3a\x22\x2fmain\x2fdockingActionToolbar\x22,\x22deferredContainerView\x22\x3anull\x7d,\x22viewName\x22\x3a\x22ActionToolbar\x22\x7d');
var configuration = {"contentId":"1fc2b60f-0a4f-441e-ad93-8bbd00fe5334","toolbarSettings":{"id":"73c8fdfd-5ac3-49e5-81ef-20637924c32d","registrationUrl":"/GMI/CoreSites/PB/Home/register/reg-fp","regAction":"FAVORITE","eSourceCode":11275,"namePassedToEvents":"RDPToolbarSTICKY","buttons":[{"addFavoriteErrorMessage":"Sorry, something went wrong. Please save again.","removeFavoriteErrorMessage":"Error occurred while removing from favorites","registrationUrl":"/GMI/CoreSites/PB/Home/register/reg-fp","regAction":"FAVORITE","eSourceCode":11275,"isCurrentUserAnonymous":false,"isFavoriteItem":false,"id":"351369d5-f1b1-4a90-b495-16074575bb8a","allowedForAnonymousUsers":false,"type":"Favorite","displayName":"Save","namePassedToEvents":"Favorite","cssClassName":"atButtonFavorite","privacyOptOutMessage":"\u003cdiv class=\u0027privacyMessage\u0027\u003e\n\u003ch3\u003eThis feature is not available with your current cookie settings.\u003c/h3\u003e\n\u003cp\u003eYou can \u003ca href=\u0027#\u0027 data-show-preference-center=\u00271\u0027\u003eupdate your privacy settings\u003c/a\u003e to enable this content. Please enable “Functional Cookies” to use this feature.\u003c/p\u003e\n\u003c/div\u003e","showPrivacyOptOutMessage":false},{"scriptUrl":"https://cdn.whisk.com/sdk/shopping-list.js","onLoadFunction":"var whisk = window.whisk || {};\r\nwhisk.queue = whisk.queue || [];\r\nwhisk.queue.push(function () {\r\n whisk.shoppingList.addRecipeToList({\r\n recipeUrl: window.location.href.replace(\u0027q.pillsbury.com\u0027, \u0027pillsbury.com\u0027),\r\n trackingId: \u0022wx-75324683-9b085240\u0022, // new action toolbar button\r\n whiteLabel: \u0022pillsbury\u0022\r\n });\r\n GeneralMills.Analytics.raiseEvent({\r\n EventType: \u0022Buy_click\u0022,\r\n Position: \u0022Floating Toolbar\u0022,\r\n VendorExperience: \u0022Whisk_recipe\u0022\r\n });\r\n});\r\n","scriptId":"recipeBuyNow","id":"b8510384-7475-408e-867a-741cbb14435f","allowedForAnonymousUsers":true,"type":"ThirdPartyScript","displayName":"Shop","namePassedToEvents":"Shop Recipe","cssClassName":"atButtonShop ","privacyCategories":[3],"privacyOptOutMessage":"\u003cdiv class=\u0027privacyMessage\u0027\u003e\n\u003ch3\u003eThis feature is not available with your current cookie settings.\u003c/h3\u003e\n\u003cp\u003eYou can \u003ca href=\u0027#\u0027 data-show-preference-center=\u00271\u0027\u003eupdate your privacy settings\u003c/a\u003e to enable this content. Please enable “Functional Cookies” to use this feature.\u003c/p\u003e\n\u003c/div\u003e","showPrivacyOptOutMessage":false},{"nestedButtons":[{"layoutParameter":"p%3d1","id":"6ef3ad08-2257-498f-9214-0be4f04b08ce","allowedForAnonymousUsers":true,"type":"Print","displayName":"Print Recipe","namePassedToEvents":"Print","cssClassName":"atButtonPrint","privacyOptOutMessage":"\u003cdiv class=\u0027privacyMessage\u0027\u003e\n\u003ch3\u003eThis feature is not available with your current cookie settings.\u003c/h3\u003e\n\u003cp\u003eYou can \u003ca href=\u0027#\u0027 data-show-preference-center=\u00271\u0027\u003eupdate your privacy settings\u003c/a\u003e to enable this content. Please enable “Functional Cookies” to use this feature.\u003c/p\u003e\n\u003c/div\u003e","showPrivacyOptOutMessage":false},{"providerName":"pinterest","providerNamePassedToEvents":"Pinterest","shareUrlFormat":"//pinterest.com/pin/create/link/?url={0}","id":"d6565c28-a8e4-4055-8668-fbfd5eccba88","allowedForAnonymousUsers":true,"type":"Social","displayName":"Save To Pinterest","namePassedToEvents":"Pinterest","cssClassName":"atButtonPinterest","privacyOptOutMessage":"\u003cdiv class=\u0027privacyMessage\u0027\u003e\n\u003ch3\u003eThis feature is not available with your current cookie settings.\u003c/h3\u003e\n\u003cp\u003eYou can \u003ca href=\u0027#\u0027 data-show-preference-center=\u00271\u0027\u003eupdate your privacy settings\u003c/a\u003e to enable this content. Please enable “Functional Cookies” to use this feature.\u003c/p\u003e\n\u003c/div\u003e","showPrivacyOptOutMessage":false},{"templateId":"25dd0d5d-57f4-47c6-a2e1-4de692d643eb","dialogHeading":"Email Recipe","emailCode":"PB_ContentEmail","dialogSettings":{"cancelButtonText":"Cancel","copyToSenderLabel":"Send a copy to myself","emailAddressesLabel":"* Email Address","emailInstructionText":"Separate email addresses with commas","fromText":"From:","privacyPolicyText":"\u003cp\u003e\u0026copy;2024 General Mills, Inc. All Rights Reserved. This information will only be used to send an email to your friend(s) and will not be saved. Please read our \u003ca rel=\u0022noopener noreferrer\u0022 rel=\u0022noopener noreferrer\u0022 href=\u0022http://www.generalmills.com/company/privacy-policies/privacy-policy-us\u0022 target=\u0022_blank\u0022 shape=\u0022rect\u0022\u003ePrivacy Policy\u003c/a\u003e.\u003c/p\u003e","requiredFieldText":"* Required","sendButtonText":"Send","senderEmailAddressLabel":"* Your Email Address","senderFirstNameLabel":"* Your First Name","sendToText":"Send To:"},"id":"80c3b664-b383-41b5-b97a-91845639d5a0","allowedForAnonymousUsers":true,"type":"Email","displayName":"Share via Email","namePassedToEvents":"Email","cssClassName":"atButtonEmail","privacyOptOutMessage":"\u003cdiv class=\u0027privacyMessage\u0027\u003e\n\u003ch3\u003eThis feature is not available with your current cookie settings.\u003c/h3\u003e\n\u003cp\u003eYou can \u003ca href=\u0027#\u0027 data-show-preference-center=\u00271\u0027\u003eupdate your privacy settings\u003c/a\u003e to enable this content. Please enable “Functional Cookies” to use this feature.\u003c/p\u003e\n\u003c/div\u003e","showPrivacyOptOutMessage":false},{"providerName":"facebook","providerNamePassedToEvents":"Facebook","shareUrlFormat":"//facebook.com/sharer/sharer.php?u={0}","id":"d4600f53-4919-44a0-aed3-6b7322540b1a","allowedForAnonymousUsers":true,"type":"Social","displayName":"Share on Facebook","namePassedToEvents":"Facebook","cssClassName":"atButtonFacebook","privacyOptOutMessage":"\u003cdiv class=\u0027privacyMessage\u0027\u003e\n\u003ch3\u003eThis feature is not available with your current cookie settings.\u003c/h3\u003e\n\u003cp\u003eYou can \u003ca href=\u0027#\u0027 data-show-preference-center=\u00271\u0027\u003eupdate your privacy settings\u003c/a\u003e to enable this content. Please enable “Functional Cookies” to use this feature.\u003c/p\u003e\n\u003c/div\u003e","showPrivacyOptOutMessage":false},{"successMessage":"Copied.","errorMessage":"Press Ctrl+C and Enter to copy to clipboard","successMessageDuration":3000,"errorMessageDuration":10000,"id":"13718d3d-801f-4dbf-abe1-4369ca03e9cd","allowedForAnonymousUsers":true,"type":"CopyLink","displayName":"Copy Link","namePassedToEvents":"Copy","cssClassName":"atButtonCopyLink","privacyOptOutMessage":"\u003cdiv class=\u0027privacyMessage\u0027\u003e\n\u003ch3\u003eThis feature is not available with your current cookie settings.\u003c/h3\u003e\n\u003cp\u003eYou can \u003ca href=\u0027#\u0027 data-show-preference-center=\u00271\u0027\u003eupdate your privacy settings\u003c/a\u003e to enable this content. Please enable “Functional Cookies” to use this feature.\u003c/p\u003e\n\u003c/div\u003e","showPrivacyOptOutMessage":false}],"id":"168a1a35-42c5-40ba-8eaa-9e789eefeaed","allowedForAnonymousUsers":true,"type":"Reveal","displayName":"Share","namePassedToEvents":"Share","cssClassName":"atButtonReveal","privacyOptOutMessage":"\u003cdiv class=\u0027privacyMessage\u0027\u003e\n\u003ch3\u003eThis feature is not available with your current cookie settings.\u003c/h3\u003e\n\u003cp\u003eYou can \u003ca href=\u0027#\u0027 data-show-preference-center=\u00271\u0027\u003eupdate your privacy settings\u003c/a\u003e to enable this content. Please enable “Functional Cookies” to use this feature.\u003c/p\u003e\n\u003c/div\u003e","showPrivacyOptOutMessage":false},{"errorMessage":"","id":"f9fa8e1c-2dc5-4470-8ca2-83ff8bd5ffd2","allowedForAnonymousUsers":true,"type":"WakeLock","displayName":"Keep Screen On","namePassedToEvents":"Wakelock","cssClassName":"atButtonWakeLock","privacyOptOutMessage":"\u003cdiv class=\u0027privacyMessage\u0027\u003e\n\u003ch3\u003eThis feature is not available with your current cookie settings.\u003c/h3\u003e\n\u003cp\u003eYou can \u003ca href=\u0027#\u0027 data-show-preference-center=\u00271\u0027\u003eupdate your privacy settings\u003c/a\u003e to enable this content. Please enable “Functional Cookies” to use this feature.\u003c/p\u003e\n\u003c/div\u003e","showPrivacyOptOutMessage":false}],"isSticky":true},"userSettings":{"isCurrentUserAnonymous":true,"isFavoriteItem":false},"pageAttributes":{"url":"https%3a%2f%2fwww.pillsbury.com%2frecipes%2fperfect-apple-pie%2f1fc2b60f-0a4f-441e-ad93-8bbd00fe5334%3fwt.mc_id%3dpaid_bannerad_4771137_997356%26sc%3d15835","contentId":"1fc2b60f-0a4f-441e-ad93-8bbd00fe5334"},"recaptchaPublicKey":"6LceAigUAAAAAC8aIQvJ9yRpRl3r1ZBKbou-tIDe"};
var moduleName = 'actionToolbar';
var isVueModule = true;
GeneralMills.PandoSites.RegisterControlInstance(moduleName, configuration, componentMetadata, isVueModule)
});
})();
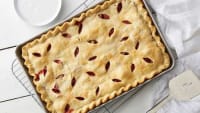
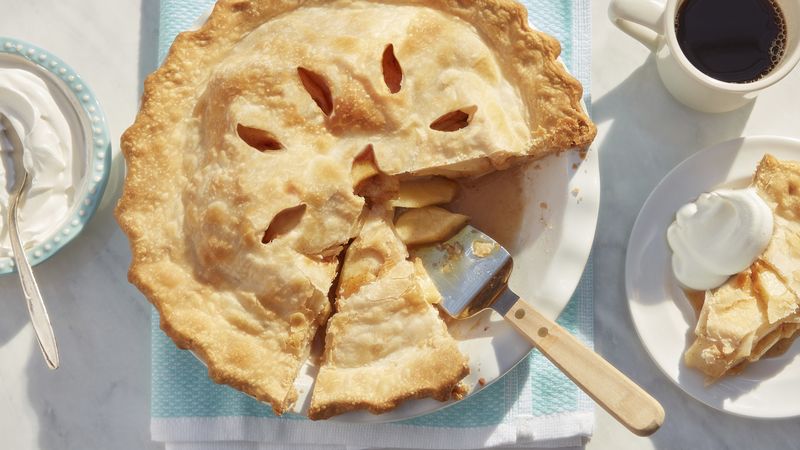
Our homemade apple pie is sure to be the best apple pie recipe you've made to date. For starters, you can make this warm, cozy, classic dessert in three simple steps, and it's made with the ultimate baking shortcut: Pillsbury™ Pie Crusts. Serve up this easy apple pie and enjoy the most classic dessert with family and friends. Whether you bake it for a holiday, a potluck or as a special weekend treat, this timeless recipe is guaranteed to spark joy.
(function() {
document.addEventListener('DOMContentLoaded', function() {
var componentMetadata = JSON.parse('\x7b\x22componentName\x22\x3a\x22ActionToolbar_73c8fdfd-5ac3-49e5-81ef-20637924c32d\x22,\x22deferOptions\x22\x3a\x7b\x22deferComponent\x22\x3afalse,\x22deferType\x22\x3a\x22None\x22,\x22deferId\x22\x3a\x22r7b2e31ecaa10496bb04b84680bca5336\x22,\x22deferredContainerId\x22\x3a\x22\x2fmain\x2fdockingActionToolbarMobile\x22,\x22deferredContainerView\x22\x3anull\x7d,\x22viewName\x22\x3a\x22ActionToolbar\x22\x7d');
var configuration = {"contentId":"1fc2b60f-0a4f-441e-ad93-8bbd00fe5334","toolbarSettings":{"id":"73c8fdfd-5ac3-49e5-81ef-20637924c32d","registrationUrl":"/GMI/CoreSites/PB/Home/register/reg-fp","regAction":"FAVORITE","eSourceCode":11275,"namePassedToEvents":"RDPToolbarSTICKY","buttons":[{"addFavoriteErrorMessage":"Sorry, something went wrong. Please save again.","removeFavoriteErrorMessage":"Error occurred while removing from favorites","registrationUrl":"/GMI/CoreSites/PB/Home/register/reg-fp","regAction":"FAVORITE","eSourceCode":11275,"isCurrentUserAnonymous":false,"isFavoriteItem":false,"id":"351369d5-f1b1-4a90-b495-16074575bb8a","allowedForAnonymousUsers":false,"type":"Favorite","displayName":"Save","namePassedToEvents":"Favorite","cssClassName":"atButtonFavorite","privacyOptOutMessage":"\u003cdiv class=\u0027privacyMessage\u0027\u003e\n\u003ch3\u003eThis feature is not available with your current cookie settings.\u003c/h3\u003e\n\u003cp\u003eYou can \u003ca href=\u0027#\u0027 data-show-preference-center=\u00271\u0027\u003eupdate your privacy settings\u003c/a\u003e to enable this content. Please enable “Functional Cookies” to use this feature.\u003c/p\u003e\n\u003c/div\u003e","showPrivacyOptOutMessage":false},{"scriptUrl":"https://cdn.whisk.com/sdk/shopping-list.js","onLoadFunction":"var whisk = window.whisk || {};\r\nwhisk.queue = whisk.queue || [];\r\nwhisk.queue.push(function () {\r\n whisk.shoppingList.addRecipeToList({\r\n recipeUrl: window.location.href.replace(\u0027q.pillsbury.com\u0027, \u0027pillsbury.com\u0027),\r\n trackingId: \u0022wx-75324683-9b085240\u0022, // new action toolbar button\r\n whiteLabel: \u0022pillsbury\u0022\r\n });\r\n GeneralMills.Analytics.raiseEvent({\r\n EventType: \u0022Buy_click\u0022,\r\n Position: \u0022Floating Toolbar\u0022,\r\n VendorExperience: \u0022Whisk_recipe\u0022\r\n });\r\n});\r\n","scriptId":"recipeBuyNow","id":"b8510384-7475-408e-867a-741cbb14435f","allowedForAnonymousUsers":true,"type":"ThirdPartyScript","displayName":"Shop","namePassedToEvents":"Shop Recipe","cssClassName":"atButtonShop ","privacyCategories":[3],"privacyOptOutMessage":"\u003cdiv class=\u0027privacyMessage\u0027\u003e\n\u003ch3\u003eThis feature is not available with your current cookie settings.\u003c/h3\u003e\n\u003cp\u003eYou can \u003ca href=\u0027#\u0027 data-show-preference-center=\u00271\u0027\u003eupdate your privacy settings\u003c/a\u003e to enable this content. Please enable “Functional Cookies” to use this feature.\u003c/p\u003e\n\u003c/div\u003e","showPrivacyOptOutMessage":false},{"nestedButtons":[{"layoutParameter":"p%3d1","id":"6ef3ad08-2257-498f-9214-0be4f04b08ce","allowedForAnonymousUsers":true,"type":"Print","displayName":"Print Recipe","namePassedToEvents":"Print","cssClassName":"atButtonPrint","privacyOptOutMessage":"\u003cdiv class=\u0027privacyMessage\u0027\u003e\n\u003ch3\u003eThis feature is not available with your current cookie settings.\u003c/h3\u003e\n\u003cp\u003eYou can \u003ca href=\u0027#\u0027 data-show-preference-center=\u00271\u0027\u003eupdate your privacy settings\u003c/a\u003e to enable this content. Please enable “Functional Cookies” to use this feature.\u003c/p\u003e\n\u003c/div\u003e","showPrivacyOptOutMessage":false},{"providerName":"pinterest","providerNamePassedToEvents":"Pinterest","shareUrlFormat":"//pinterest.com/pin/create/link/?url={0}","id":"d6565c28-a8e4-4055-8668-fbfd5eccba88","allowedForAnonymousUsers":true,"type":"Social","displayName":"Save To Pinterest","namePassedToEvents":"Pinterest","cssClassName":"atButtonPinterest","privacyOptOutMessage":"\u003cdiv class=\u0027privacyMessage\u0027\u003e\n\u003ch3\u003eThis feature is not available with your current cookie settings.\u003c/h3\u003e\n\u003cp\u003eYou can \u003ca href=\u0027#\u0027 data-show-preference-center=\u00271\u0027\u003eupdate your privacy settings\u003c/a\u003e to enable this content. Please enable “Functional Cookies” to use this feature.\u003c/p\u003e\n\u003c/div\u003e","showPrivacyOptOutMessage":false},{"templateId":"25dd0d5d-57f4-47c6-a2e1-4de692d643eb","dialogHeading":"Email Recipe","emailCode":"PB_ContentEmail","dialogSettings":{"cancelButtonText":"Cancel","copyToSenderLabel":"Send a copy to myself","emailAddressesLabel":"* Email Address","emailInstructionText":"Separate email addresses with commas","fromText":"From:","privacyPolicyText":"\u003cp\u003e\u0026copy;2024 General Mills, Inc. All Rights Reserved. This information will only be used to send an email to your friend(s) and will not be saved. Please read our \u003ca rel=\u0022noopener noreferrer\u0022 rel=\u0022noopener noreferrer\u0022 href=\u0022http://www.generalmills.com/company/privacy-policies/privacy-policy-us\u0022 target=\u0022_blank\u0022 shape=\u0022rect\u0022\u003ePrivacy Policy\u003c/a\u003e.\u003c/p\u003e","requiredFieldText":"* Required","sendButtonText":"Send","senderEmailAddressLabel":"* Your Email Address","senderFirstNameLabel":"* Your First Name","sendToText":"Send To:"},"id":"80c3b664-b383-41b5-b97a-91845639d5a0","allowedForAnonymousUsers":true,"type":"Email","displayName":"Share via Email","namePassedToEvents":"Email","cssClassName":"atButtonEmail","privacyOptOutMessage":"\u003cdiv class=\u0027privacyMessage\u0027\u003e\n\u003ch3\u003eThis feature is not available with your current cookie settings.\u003c/h3\u003e\n\u003cp\u003eYou can \u003ca href=\u0027#\u0027 data-show-preference-center=\u00271\u0027\u003eupdate your privacy settings\u003c/a\u003e to enable this content. Please enable “Functional Cookies” to use this feature.\u003c/p\u003e\n\u003c/div\u003e","showPrivacyOptOutMessage":false},{"providerName":"facebook","providerNamePassedToEvents":"Facebook","shareUrlFormat":"//facebook.com/sharer/sharer.php?u={0}","id":"d4600f53-4919-44a0-aed3-6b7322540b1a","allowedForAnonymousUsers":true,"type":"Social","displayName":"Share on Facebook","namePassedToEvents":"Facebook","cssClassName":"atButtonFacebook","privacyOptOutMessage":"\u003cdiv class=\u0027privacyMessage\u0027\u003e\n\u003ch3\u003eThis feature is not available with your current cookie settings.\u003c/h3\u003e\n\u003cp\u003eYou can \u003ca href=\u0027#\u0027 data-show-preference-center=\u00271\u0027\u003eupdate your privacy settings\u003c/a\u003e to enable this content. Please enable “Functional Cookies” to use this feature.\u003c/p\u003e\n\u003c/div\u003e","showPrivacyOptOutMessage":false},{"successMessage":"Copied.","errorMessage":"Press Ctrl+C and Enter to copy to clipboard","successMessageDuration":3000,"errorMessageDuration":10000,"id":"13718d3d-801f-4dbf-abe1-4369ca03e9cd","allowedForAnonymousUsers":true,"type":"CopyLink","displayName":"Copy Link","namePassedToEvents":"Copy","cssClassName":"atButtonCopyLink","privacyOptOutMessage":"\u003cdiv class=\u0027privacyMessage\u0027\u003e\n\u003ch3\u003eThis feature is not available with your current cookie settings.\u003c/h3\u003e\n\u003cp\u003eYou can \u003ca href=\u0027#\u0027 data-show-preference-center=\u00271\u0027\u003eupdate your privacy settings\u003c/a\u003e to enable this content. Please enable “Functional Cookies” to use this feature.\u003c/p\u003e\n\u003c/div\u003e","showPrivacyOptOutMessage":false}],"id":"168a1a35-42c5-40ba-8eaa-9e789eefeaed","allowedForAnonymousUsers":true,"type":"Reveal","displayName":"Share","namePassedToEvents":"Share","cssClassName":"atButtonReveal","privacyOptOutMessage":"\u003cdiv class=\u0027privacyMessage\u0027\u003e\n\u003ch3\u003eThis feature is not available with your current cookie settings.\u003c/h3\u003e\n\u003cp\u003eYou can \u003ca href=\u0027#\u0027 data-show-preference-center=\u00271\u0027\u003eupdate your privacy settings\u003c/a\u003e to enable this content. Please enable “Functional Cookies” to use this feature.\u003c/p\u003e\n\u003c/div\u003e","showPrivacyOptOutMessage":false},{"errorMessage":"","id":"f9fa8e1c-2dc5-4470-8ca2-83ff8bd5ffd2","allowedForAnonymousUsers":true,"type":"WakeLock","displayName":"Keep Screen On","namePassedToEvents":"Wakelock","cssClassName":"atButtonWakeLock","privacyOptOutMessage":"\u003cdiv class=\u0027privacyMessage\u0027\u003e\n\u003ch3\u003eThis feature is not available with your current cookie settings.\u003c/h3\u003e\n\u003cp\u003eYou can \u003ca href=\u0027#\u0027 data-show-preference-center=\u00271\u0027\u003eupdate your privacy settings\u003c/a\u003e to enable this content. Please enable “Functional Cookies” to use this feature.\u003c/p\u003e\n\u003c/div\u003e","showPrivacyOptOutMessage":false}],"isSticky":true},"userSettings":{"isCurrentUserAnonymous":true,"isFavoriteItem":false},"pageAttributes":{"url":"https%3a%2f%2fwww.pillsbury.com%2frecipes%2fperfect-apple-pie%2f1fc2b60f-0a4f-441e-ad93-8bbd00fe5334%3fwt.mc_id%3dpaid_bannerad_4771137_997356%26sc%3d15835","contentId":"1fc2b60f-0a4f-441e-ad93-8bbd00fe5334"},"recaptchaPublicKey":"6LceAigUAAAAAC8aIQvJ9yRpRl3r1ZBKbou-tIDe"};
var moduleName = 'actionToolbar';
var isVueModule = true;
GeneralMills.PandoSites.RegisterControlInstance(moduleName, configuration, componentMetadata, isVueModule)
});
})();
What Are the Best Apples for Apple Pie?
When making homemade apple pie, it’s important to choose apples with the right texture and flavor. The best apples for apple pie are crisp and firm, with an equal balance of sweetness and tartness. We love using the Granny Smith apple due to its tangy, tart flavor and its firm flesh that doesn’t break down in the oven.
The juicy, sweet, and firm Honeycrisp is also a great choice for homemade apple pie. (Make sure to stock up on this apple in the fall while it’s in season!) The Gala apple is a great option year-round, with a mildly sweet taste and a crisp texture that doesn’t get mealy in the oven. Prefer a softer apple pie with a natural sweetness? Choose Golden Delicious apples.
For the best apple pie possible, there’s just one variety of apples we’d avoid completely—the Red Delicious. These apples may taste yummy on their own, but they lack the tartness that really enhances the rich apple flavor of an apple pie. They also break down in the oven and become mushy.
How to Store Apple Pie
We’d be surprised if you end up with any leftovers, but not to worry—your extra homemade apple pie doesn’t have to go uneaten! To keep the pie fresh, allow it to cool for 2 hours after baking. Cover the entire pie with plastic wrap or aluminum foil, and store it at room temperature for up to 2 days. Still have some left? Store it in the fridge for 2 additional days! When you’re ready for a slice, just heat it up in the microwave for a few seconds.
Want to store your baked apple pie for a longer time period? You can keep this sweet treat in the freezer for up to 4 months! Assemble and bake your easy apple pie as directed in the recipe and let it cool completely. Wrap your pie tightly with plastic wrap, seal it in a 2-gallon freezer storage bag and place it in the freezer. When you’re ready to eat the pie, unwrap it and let it thaw at room temperature for an hour. Stick it in the oven at 375°F.
Heat oven to 425°F. Place 1 pie crust in ungreased 9-inch glass pie plate. Press firmly against side and bottom.
2
In large bowl, gently mix filling ingredients; spoon into crust-lined pie plate. Top with second crust. Wrap excess top crust under bottom crust edge, pressing edges together to seal; flute. Cut slits or shapes in several places in top crust.
3
Bake 40 to 45 minutes or until apples are tender and crust is golden brown. Cover edge of crust with 2- to 3-inch wide strips of foil after first 15 to 20 minutes of baking to prevent excessive browning. Cool on cooling rack at least 2 hours before serving.
(function() {
document.addEventListener('DOMContentLoaded', function() {
var componentMetadata = JSON.parse('\x7b\x22componentName\x22\x3a\x22RecipeSteps_e8af84a8-5198-47ca-bc1c-daf22247ecf7\x22,\x22deferOptions\x22\x3a\x7b\x22deferComponent\x22\x3atrue,\x22deferType\x22\x3a\x22OnDemand\x22,\x22deferId\x22\x3a\x22r88c489ffeb6c41408f93366540d7735f\x22,\x22deferredContainerId\x22\x3a\x22\x2fmain\x2frdpSteps\x22,\x22deferredContainerView\x22\x3a\x22RecipeDetail\x22\x7d,\x22viewName\x22\x3a\x22RecipeSteps\x22\x7d');
var configuration = {"initAreImagesHidden":false,"hideImagesEventName":"HideStepShots","showImagesEventName":"ShowStepShots","hideImagesButtonText":"Hide Images","showImagesButtonText":"Show Images","hideImagesClass":"rdpHideStepImages"};
var moduleName = 'recipeStepShots';
var isVueModule = true;
GeneralMills.PandoSites.RegisterControlInstance(moduleName, configuration, componentMetadata, isVueModule)
});
})();
Tips from the Pillsbury Kitchens
tip 1
One package (12 oz) frozen Pillsbury™ Deep Dish Pie Crusts (2 Count) may be substituted for the refrigerated Pillsbury™ Pie Crusts in this recipe. Place cookie sheet on oven rack. Heat oven as directed. Prepare filling and follow directions on package for Two-Crust Filled Pie.
tip 2
The flour tossed with the fresh apples turns their juices into a thickened, spiced sauce during baking. Mix it with the sugar and spices before tossing the mixture with the apples.
tip 3
Two (21-oz.) cans of more fruit apple pie filling can be used if you’re short on time.
tip 4
Let your apple pie cool for at least 2 hours before cutting into it. The filling will thicken as it cools, making it easier to slice.
tip 5
To make Caramel-Pecan Apple Pie: right after removing the pie from the oven, drizzle with 1/3 cup caramel ice cream topping. Sprinkle with 2 to 4 tablespoons chopped pecans.
(function() {
document.addEventListener('DOMContentLoaded', function() {
var componentMetadata = JSON.parse('\x7b\x22componentName\x22\x3a\x22RecipeTipsNonPrint_e8af84a8-5198-47ca-bc1c-daf22247ecf7\x22,\x22deferOptions\x22\x3a\x7b\x22deferComponent\x22\x3atrue,\x22deferType\x22\x3a\x22Simple\x22,\x22deferId\x22\x3a\x22r6e2431d09d6e4632af8a67b6466ac6d9\x22,\x22deferredContainerId\x22\x3a\x22\x2fmain\x2frdpTips\x22,\x22deferredContainerView\x22\x3a\x22RecipeDetail\x22\x7d,\x22viewName\x22\x3a\x22RecipeTipsNonPrint\x22\x7d');
var configuration = {};
var moduleName = 'expandableTextContainer';
var isVueModule = true;
GeneralMills.PandoSites.RegisterControlInstance(moduleName, configuration, componentMetadata, isVueModule)
});
})();
Frequently Asked Questions
What Are the Different Types of Apple Pie Crust?
This apple pie recipe uses refrigerated pie crusts for a quick, convenient and homemade-quality result—but there are plenty of other crust options. Have a frozen pie crust on hand? Remove it from the box and let it thaw at room temperature for 60 to 90 minutes before unfolding it, and you’re good to go. Want bragging rights about making a homemade apple pie crust? Try whipping up a two-crust pastry dough from scratch!
Whatever type of crust you’re using, it’s helpful to know the different decorating techniques so you can switch up the look of your dessert. A one-crust pie is extra easy to make, allowing you to top off your apple pie with a crumbly streusel or any of your favorite toppings instead of the second crust. We love the sweet crumb topping on this Dutch Apple Pie! For an ultra-impressive presentation, we love assembling a two-crust pie with a lattice crust like in our Caramel Apple Pie. It features alternating strips of weaved dough on the top crust.
This classic apple pie recipe makes a basic two-crust pie, with fluted crimped edges and cut-out slits on the top crust. Finishing off your pie with decorative edges is the easiest way to switch up the presentation—the most common methods include scalloped, pinched and forked edges. Learn more about these techniques with our handy how-to guide, and a beautiful crust is easy as pie!
How Should I Serve Apple Pie?
This homemade apple pie is obviously yummy on its own, but why not double the decadence with tasty toppings? Our favorite way to eat apple pie is à la mode, or “served with a scoop of ice cream.” Warm up a slice of this easy apple pie in the microwave for a few seconds and top with a hefty scoop of vanilla ice cream for an ooey-gooey result that can’t be beat. If you have any on hand, add a sweet drizzle of caramel ice cream topping and a sprinkle of pecans for a satisfying crunch. Dessert doesn’t get any better than this!
Nutrition Information
230 Calories, 6g Total Fat, 1g Protein, 43g Total Carbohydrate, 27g Sugars
*Percent Daily Values are based on a 2,000 calorie diet.
(function() {
document.addEventListener('DOMContentLoaded', function() {
var componentMetadata = JSON.parse('\x7b\x22componentName\x22\x3a\x22RecipeNutritionNonPrint_e8af84a8-5198-47ca-bc1c-daf22247ecf7\x22,\x22deferOptions\x22\x3a\x7b\x22deferComponent\x22\x3atrue,\x22deferType\x22\x3a\x22Simple\x22,\x22deferId\x22\x3a\x22r5d66d9008aa34d3e8b83b19f72c7d8ea\x22,\x22deferredContainerId\x22\x3a\x22\x2fmain\x2frdpNutrition\x22,\x22deferredContainerView\x22\x3a\x22RecipeDetail\x22\x7d,\x22viewName\x22\x3a\x22RecipeNutritionNonPrint\x22\x7d');
var configuration = {"initIsExpanded":false,"expandEventName":"NutritionExpand","collapseEventName":"NutritionCollapse"};
var moduleName = 'recipeNutrition';
var isVueModule = true;
GeneralMills.PandoSites.RegisterControlInstance(moduleName, configuration, componentMetadata, isVueModule)
});
})();
More About This Recipe
This apple pie recipe is already perfect, but if you want it to look as perfect as it tastes, we have a few expert recommendations for you. First, refrigerated pie crusts should be baked in glass pie plates. A dark pan will cause too much browning while a shiny pan will prevent your pie from achieving the golden-brown crust that makes apple pie irresistible. Speaking of overbrowning, to prevent your crust from burning, cover the edges with strips of foil 20 minutes into the bake time. When you use refrigerated pie crust, you must allow the dough to soften before you use it. Otherwise you will have difficulty pressing the dough and getting it to adhere to the pie plate. Perfecting the crust is arguably the most important part of pie making. But the filling is the other half of the equation. Lucky for you, we have a few tricks up our sleeve for that, too. If you love apple pie, give these other apple pie recipes a try!
(function() {
document.addEventListener('DOMContentLoaded', function() {
var componentMetadata = JSON.parse('\x7b\x22componentName\x22\x3a\x22RecipeTipCategory_e8af84a8-5198-47ca-bc1c-daf22247ecf7\x22,\x22deferOptions\x22\x3a\x7b\x22deferComponent\x22\x3atrue,\x22deferType\x22\x3a\x22Simple\x22,\x22deferId\x22\x3a\x22r996a3f9c88f64deb969d449dda3b27ea\x22,\x22deferredContainerId\x22\x3a\x22\x2fmain\x2frdpStories\x22,\x22deferredContainerView\x22\x3a\x22RecipeDetail\x22\x7d,\x22viewName\x22\x3a\x22RecipeTipCategory\x22\x7d');
var configuration = {"expandEventName":"MoreAboutRecipeExpand","collapseEventName":"MoreAboutRecipeCollapse"};
var moduleName = 'recipeTipCategory';
var isVueModule = true;
GeneralMills.PandoSites.RegisterControlInstance(moduleName, configuration, componentMetadata, isVueModule)
});
})();
(function() {
document.addEventListener('DOMContentLoaded', function() {
var componentMetadata = JSON.parse('\x7b\x22componentName\x22\x3a\x22RelatedContent_361c0546-a387-4d38-a6e2-098203023ed4\x22,\x22deferOptions\x22\x3a\x7b\x22deferComponent\x22\x3atrue,\x22deferType\x22\x3a\x22OnDemand\x22,\x22deferId\x22\x3a\x22r54d6fc732c064feba941d3eb2bda5e23\x22,\x22deferredContainerId\x22\x3a\x22\x2fmain\x2frdpRelatedContent1\x22,\x22deferredContainerView\x22\x3a\x22RecipeDetail\x22\x7d,\x22viewName\x22\x3a\x22RelatedContent\x22\x7d');
var configuration = {"dataSourceId":"361c0546-a387-4d38-a6e2-098203023ed4","isCurrentUserAnonymous":true,"relatedContentList":{"contentId":"1fc2b60f-0a4f-441e-ad93-8bbd00fe5334","listSettings":{"pageSize":6,"startPage":1,"listType":1,"title":"Try These Next","useModalRegistration":false,"regAction":"","esrcCode":0,"favoriteButtonLabelFormat":"Add {0} to favorites","contentTypes":[],"showImages":true,"showRatings":false,"allowFavoriting":true,"cssClassName":""},"items":[{"contentId":"bebb6148-6e4a-441d-9212-f435d974dcc6","contentType":"Recipe","title":"Apple Pie Crescents ","isFavorite":false,"linkUrl":"/recipes/apple-pie-crescents/bebb6148-6e4a-441d-9212-f435d974dcc6","numberOfRatings":"137","averageRating":"100","averageRatingStars":"5","smallImageUrl":"//mojo.generalmills.com/api/public/content/Kfl1QtW1FEeRNYCMLE1INQ_gmi_hi_res_jpeg.jpeg?v=034e2707\u0026t=205ad118875f48b5b556c2955695e2f6","mediumImageUrl":"//mojo.generalmills.com/api/public/content/Kfl1QtW1FEeRNYCMLE1INQ_gmi_hi_res_jpeg.jpeg?v=034e2707\u0026t=9df44d78ea5c47f98018cc1578c6de79"},{"contentId":"d4b31ad3-7816-4971-a3f5-37eca7e017f7","contentType":"Recipe","title":"Mini Apple Pies","isFavorite":false,"linkUrl":"/recipes/mini-apple-pies/d4b31ad3-7816-4971-a3f5-37eca7e017f7","numberOfRatings":"15","averageRating":"90","averageRatingStars":"4.5","smallImageUrl":"//mojo.generalmills.com/api/public/content/GkoyarzVN0ysTa-xu42qDw_gmi_hi_res_jpeg.jpeg?v=47c9fb93\u0026t=205ad118875f48b5b556c2955695e2f6","mediumImageUrl":"//mojo.generalmills.com/api/public/content/GkoyarzVN0ysTa-xu42qDw_gmi_hi_res_jpeg.jpeg?v=47c9fb93\u0026t=9df44d78ea5c47f98018cc1578c6de79"},{"contentId":"0abd84dd-0bce-44ae-b02d-963442eb02d5","contentType":"Recipe","title":"Perfect Pumpkin Pie","isFavorite":false,"linkUrl":"/recipes/perfect-pumpkin-pie/0abd84dd-0bce-44ae-b02d-963442eb02d5","numberOfRatings":"105","averageRating":"80","averageRatingStars":"4","smallImageUrl":"//mojo.generalmills.com/api/public/content/JAMY2X-ey0SUiaVT7yyhkw_gmi_hi_res_jpeg.jpeg?v=915dc8fd\u0026t=205ad118875f48b5b556c2955695e2f6","mediumImageUrl":"//mojo.generalmills.com/api/public/content/JAMY2X-ey0SUiaVT7yyhkw_gmi_hi_res_jpeg.jpeg?v=915dc8fd\u0026t=9df44d78ea5c47f98018cc1578c6de79"},{"contentId":"0856535f-aaed-4204-9b3f-8442d5b9330f","contentType":"Recipe","title":"Caramel Apple Pie","isFavorite":false,"linkUrl":"/recipes/caramel-apple-pie/0856535f-aaed-4204-9b3f-8442d5b9330f","numberOfRatings":"62","averageRating":"80","averageRatingStars":"4","smallImageUrl":"//mojo.generalmills.com/api/public/content/T87Gl18jr025Zu32OG94GQ_gmi_hi_res_jpeg.jpeg?v=b2680bba\u0026t=205ad118875f48b5b556c2955695e2f6","mediumImageUrl":"//mojo.generalmills.com/api/public/content/T87Gl18jr025Zu32OG94GQ_gmi_hi_res_jpeg.jpeg?v=b2680bba\u0026t=9df44d78ea5c47f98018cc1578c6de79"},{"contentId":"43110a9e-292d-4796-a241-05611965668e","contentType":"Recipe","title":"Apple Crescent Dumplings","isFavorite":false,"linkUrl":"/recipes/apple-crescent-dumplings/43110a9e-292d-4796-a241-05611965668e","numberOfRatings":"154","averageRating":"90","averageRatingStars":"4.5","smallImageUrl":"//mojo.generalmills.com/api/public/content/f4TmuOlh-EqDyEhMg-UhsA_gmi_hi_res_jpeg.jpeg?v=cf486b62\u0026t=205ad118875f48b5b556c2955695e2f6","mediumImageUrl":"//mojo.generalmills.com/api/public/content/f4TmuOlh-EqDyEhMg-UhsA_gmi_hi_res_jpeg.jpeg?v=cf486b62\u0026t=9df44d78ea5c47f98018cc1578c6de79"},{"contentId":"918a2d34-2dce-459c-ae04-570fba0b8355","contentType":"Recipe","title":"Apple Upside-Down Pie","isFavorite":false,"linkUrl":"/recipes/apple-upside-down-pie/918a2d34-2dce-459c-ae04-570fba0b8355","numberOfRatings":"13","averageRating":"90","averageRatingStars":"4.5","smallImageUrl":"//mojo.generalmills.com/api/public/content/ZWYlvpuY8022jyjWffT7PA_gmi_hi_res_jpeg.jpeg?v=fa10ddfe\u0026t=205ad118875f48b5b556c2955695e2f6","mediumImageUrl":"//mojo.generalmills.com/api/public/content/ZWYlvpuY8022jyjWffT7PA_gmi_hi_res_jpeg.jpeg?v=fa10ddfe\u0026t=9df44d78ea5c47f98018cc1578c6de79"}],"availableItems":[{"contentId":"bebb6148-6e4a-441d-9212-f435d974dcc6","contentType":"Recipe","title":"Apple Pie Crescents ","isFavorite":false,"linkUrl":"/recipes/apple-pie-crescents/bebb6148-6e4a-441d-9212-f435d974dcc6","numberOfRatings":"137","averageRating":"100","averageRatingStars":"5","smallImageUrl":"//mojo.generalmills.com/api/public/content/Kfl1QtW1FEeRNYCMLE1INQ_gmi_hi_res_jpeg.jpeg?v=034e2707\u0026t=205ad118875f48b5b556c2955695e2f6","mediumImageUrl":"//mojo.generalmills.com/api/public/content/Kfl1QtW1FEeRNYCMLE1INQ_gmi_hi_res_jpeg.jpeg?v=034e2707\u0026t=9df44d78ea5c47f98018cc1578c6de79"},{"contentId":"d4b31ad3-7816-4971-a3f5-37eca7e017f7","contentType":"Recipe","title":"Mini Apple Pies","isFavorite":false,"linkUrl":"/recipes/mini-apple-pies/d4b31ad3-7816-4971-a3f5-37eca7e017f7","numberOfRatings":"15","averageRating":"90","averageRatingStars":"4.5","smallImageUrl":"//mojo.generalmills.com/api/public/content/GkoyarzVN0ysTa-xu42qDw_gmi_hi_res_jpeg.jpeg?v=47c9fb93\u0026t=205ad118875f48b5b556c2955695e2f6","mediumImageUrl":"//mojo.generalmills.com/api/public/content/GkoyarzVN0ysTa-xu42qDw_gmi_hi_res_jpeg.jpeg?v=47c9fb93\u0026t=9df44d78ea5c47f98018cc1578c6de79"},{"contentId":"0abd84dd-0bce-44ae-b02d-963442eb02d5","contentType":"Recipe","title":"Perfect Pumpkin Pie","isFavorite":false,"linkUrl":"/recipes/perfect-pumpkin-pie/0abd84dd-0bce-44ae-b02d-963442eb02d5","numberOfRatings":"105","averageRating":"80","averageRatingStars":"4","smallImageUrl":"//mojo.generalmills.com/api/public/content/JAMY2X-ey0SUiaVT7yyhkw_gmi_hi_res_jpeg.jpeg?v=915dc8fd\u0026t=205ad118875f48b5b556c2955695e2f6","mediumImageUrl":"//mojo.generalmills.com/api/public/content/JAMY2X-ey0SUiaVT7yyhkw_gmi_hi_res_jpeg.jpeg?v=915dc8fd\u0026t=9df44d78ea5c47f98018cc1578c6de79"},{"contentId":"0856535f-aaed-4204-9b3f-8442d5b9330f","contentType":"Recipe","title":"Caramel Apple Pie","isFavorite":false,"linkUrl":"/recipes/caramel-apple-pie/0856535f-aaed-4204-9b3f-8442d5b9330f","numberOfRatings":"62","averageRating":"80","averageRatingStars":"4","smallImageUrl":"//mojo.generalmills.com/api/public/content/T87Gl18jr025Zu32OG94GQ_gmi_hi_res_jpeg.jpeg?v=b2680bba\u0026t=205ad118875f48b5b556c2955695e2f6","mediumImageUrl":"//mojo.generalmills.com/api/public/content/T87Gl18jr025Zu32OG94GQ_gmi_hi_res_jpeg.jpeg?v=b2680bba\u0026t=9df44d78ea5c47f98018cc1578c6de79"},{"contentId":"43110a9e-292d-4796-a241-05611965668e","contentType":"Recipe","title":"Apple Crescent Dumplings","isFavorite":false,"linkUrl":"/recipes/apple-crescent-dumplings/43110a9e-292d-4796-a241-05611965668e","numberOfRatings":"154","averageRating":"90","averageRatingStars":"4.5","smallImageUrl":"//mojo.generalmills.com/api/public/content/f4TmuOlh-EqDyEhMg-UhsA_gmi_hi_res_jpeg.jpeg?v=cf486b62\u0026t=205ad118875f48b5b556c2955695e2f6","mediumImageUrl":"//mojo.generalmills.com/api/public/content/f4TmuOlh-EqDyEhMg-UhsA_gmi_hi_res_jpeg.jpeg?v=cf486b62\u0026t=9df44d78ea5c47f98018cc1578c6de79"},{"contentId":"918a2d34-2dce-459c-ae04-570fba0b8355","contentType":"Recipe","title":"Apple Upside-Down Pie","isFavorite":false,"linkUrl":"/recipes/apple-upside-down-pie/918a2d34-2dce-459c-ae04-570fba0b8355","numberOfRatings":"13","averageRating":"90","averageRatingStars":"4.5","smallImageUrl":"//mojo.generalmills.com/api/public/content/ZWYlvpuY8022jyjWffT7PA_gmi_hi_res_jpeg.jpeg?v=fa10ddfe\u0026t=205ad118875f48b5b556c2955695e2f6","mediumImageUrl":"//mojo.generalmills.com/api/public/content/ZWYlvpuY8022jyjWffT7PA_gmi_hi_res_jpeg.jpeg?v=fa10ddfe\u0026t=9df44d78ea5c47f98018cc1578c6de79"}]}};
var moduleName = 'relatedContent';
var isVueModule = true;
GeneralMills.PandoSites.RegisterControlInstance(moduleName, configuration, componentMetadata, isVueModule)
});
})();
(function() {
document.addEventListener('DOMContentLoaded', function() {
var componentMetadata = JSON.parse('\x7b\x22componentName\x22\x3a\x22RelatedContent_d71390e3-0c2b-4b8a-843d-201bfd75ec76\x22,\x22deferOptions\x22\x3a\x7b\x22deferComponent\x22\x3atrue,\x22deferType\x22\x3a\x22OnDemand\x22,\x22deferId\x22\x3a\x22r83abc46dc63447208a6c732607ac35df\x22,\x22deferredContainerId\x22\x3a\x22\x2fmain\x2frdpRelatedContent1\x22,\x22deferredContainerView\x22\x3a\x22RecipeDetail\x22\x7d,\x22viewName\x22\x3a\x22RelatedContent\x22\x7d');
var configuration = {"dataSourceId":"d71390e3-0c2b-4b8a-843d-201bfd75ec76","isCurrentUserAnonymous":true,"relatedContentList":{"contentId":"1fc2b60f-0a4f-441e-ad93-8bbd00fe5334","listSettings":{"pageSize":3,"startPage":1,"listType":1,"title":"Explore Categories","useModalRegistration":false,"regAction":"","esrcCode":0,"favoriteButtonLabelFormat":"Add {0} to favorites","contentTypes":["Category"],"showImages":false,"showRatings":false,"allowFavoriting":false,"cssClassName":"relatedContentWithoutImages"},"items":[{"contentId":"b35d1266-cd24-41cc-9f9e-5b87d9d46484","contentType":"Category","title":"Apple Recipes","isFavorite":false,"linkUrl":"/recipes/ingredient/apples","numberOfRatings":"0","averageRating":"0","averageRatingStars":"0","smallImageUrl":"/-/media/GMI/Core-Sites/PB/PB/Images/recipes-hero/desserts/caramel-apple-pie-cookies_hero.jpg?W=276","mediumImageUrl":"/-/media/GMI/Core-Sites/PB/PB/Images/recipes-hero/desserts/caramel-apple-pie-cookies_hero.jpg?W=680"},{"contentId":"3ea476e7-7041-4346-a7c7-7835368f326b","contentType":"Category","title":"Apple Pie Recipes","isFavorite":false,"linkUrl":"/recipes/dish-type/pies/apple","numberOfRatings":"0","averageRating":"0","averageRatingStars":"0","smallImageUrl":"/-/media/GMI/Core-Sites/PB/PB/Images/recipes-hero/desserts/perfect-apple-pie_hero.jpg?W=276","mediumImageUrl":"/-/media/GMI/Core-Sites/PB/PB/Images/recipes-hero/desserts/perfect-apple-pie_hero.jpg?W=680"},{"contentId":"c18f46f0-d5ed-4151-a5a6-6980eebd58f2","contentType":"Category","title":"Apple Cookie Recipes","isFavorite":false,"linkUrl":"/recipes/dish-type/cookies/apple","numberOfRatings":"0","averageRating":"0","averageRatingStars":"0","smallImageUrl":"/-/media/GMI/Core-Sites/PB/PB/Images/recipes-hero/desserts/caramel-apple-pie-cookies_hero.jpg?W=276","mediumImageUrl":"/-/media/GMI/Core-Sites/PB/PB/Images/recipes-hero/desserts/caramel-apple-pie-cookies_hero.jpg?W=680"}],"availableItems":[{"contentId":"b35d1266-cd24-41cc-9f9e-5b87d9d46484","contentType":"Category","title":"Apple Recipes","isFavorite":false,"linkUrl":"/recipes/ingredient/apples","numberOfRatings":"0","averageRating":"0","averageRatingStars":"0","smallImageUrl":"/-/media/GMI/Core-Sites/PB/PB/Images/recipes-hero/desserts/caramel-apple-pie-cookies_hero.jpg?W=276","mediumImageUrl":"/-/media/GMI/Core-Sites/PB/PB/Images/recipes-hero/desserts/caramel-apple-pie-cookies_hero.jpg?W=680"},{"contentId":"3ea476e7-7041-4346-a7c7-7835368f326b","contentType":"Category","title":"Apple Pie Recipes","isFavorite":false,"linkUrl":"/recipes/dish-type/pies/apple","numberOfRatings":"0","averageRating":"0","averageRatingStars":"0","smallImageUrl":"/-/media/GMI/Core-Sites/PB/PB/Images/recipes-hero/desserts/perfect-apple-pie_hero.jpg?W=276","mediumImageUrl":"/-/media/GMI/Core-Sites/PB/PB/Images/recipes-hero/desserts/perfect-apple-pie_hero.jpg?W=680"},{"contentId":"c18f46f0-d5ed-4151-a5a6-6980eebd58f2","contentType":"Category","title":"Apple Cookie Recipes","isFavorite":false,"linkUrl":"/recipes/dish-type/cookies/apple","numberOfRatings":"0","averageRating":"0","averageRatingStars":"0","smallImageUrl":"/-/media/GMI/Core-Sites/PB/PB/Images/recipes-hero/desserts/caramel-apple-pie-cookies_hero.jpg?W=276","mediumImageUrl":"/-/media/GMI/Core-Sites/PB/PB/Images/recipes-hero/desserts/caramel-apple-pie-cookies_hero.jpg?W=680"}]}};
var moduleName = 'relatedContent';
var isVueModule = true;
GeneralMills.PandoSites.RegisterControlInstance(moduleName, configuration, componentMetadata, isVueModule)
});
})();
(function() {
document.addEventListener('DOMContentLoaded', function() {
var componentMetadata = JSON.parse('\x7b\x22componentName\x22\x3a\x22ConsumerGeneratedContent_e8af84a8-5198-47ca-bc1c-daf22247ecf7\x22,\x22deferOptions\x22\x3a\x7b\x22deferComponent\x22\x3atrue,\x22deferType\x22\x3a\x22OnDemand\x22,\x22deferId\x22\x3a\x22r2736496b189e4ffb8fbda501e3436477\x22,\x22deferredContainerId\x22\x3a\x22\x2fmain\x2frdpCgc\x22,\x22deferredContainerView\x22\x3a\x22RecipeDetail\x22\x7d,\x22viewName\x22\x3a\x22ConsumerGeneratedContent\x22\x7d');
var configuration = {"loaderScript":"https://apps.bazaarvoice.com/deployments/pillsbury-en_us/main_site/production/en_US/bv.js","type":"RatingAndReview","language":"en","includeRatings":true};
var moduleName = 'consumerGeneratedContent';
var isVueModule = true;
GeneralMills.PandoSites.RegisterControlInstance(moduleName, configuration, componentMetadata, isVueModule)
});
})();
(function() {
document.addEventListener('DOMContentLoaded', function() {
var componentMetadata = JSON.parse('\x7b\x22componentName\x22\x3a\x22ConsumerGeneratedContent_e8af84a8-5198-47ca-bc1c-daf22247ecf7\x22,\x22deferOptions\x22\x3a\x7b\x22deferComponent\x22\x3atrue,\x22deferType\x22\x3a\x22OnDemand\x22,\x22deferId\x22\x3a\x22rdc62feee770141ee80d07fb3d6610a79\x22,\x22deferredContainerId\x22\x3a\x22\x2fmain\x2frdpCgc\x22,\x22deferredContainerView\x22\x3a\x22RecipeDetail\x22\x7d,\x22viewName\x22\x3a\x22ConsumerGeneratedContent\x22\x7d');
var configuration = {"loaderScript":"https://apps.bazaarvoice.com/deployments/pillsbury-en_us/main_site/production/en_US/bv.js","type":"QuestionAndAnswer","language":"en","includeRatings":false};
var moduleName = 'consumerGeneratedContent';
var isVueModule = true;
GeneralMills.PandoSites.RegisterControlInstance(moduleName, configuration, componentMetadata, isVueModule)
});
})();
(function() {
document.addEventListener('DOMContentLoaded', function() {
var componentMetadata = JSON.parse('\x7b\x22componentName\x22\x3a\x22DoubleClick_ada1eeda-a2cc-40ec-b38b-ce2b90014cba\x22,\x22deferOptions\x22\x3a\x7b\x22deferComponent\x22\x3afalse,\x22deferType\x22\x3a\x22None\x22,\x22deferId\x22\x3a\x22re15937f23a7d4f3a8f6ac99c670e0c3b\x22,\x22deferredContainerId\x22\x3a\x22\x2fmain\x2frdpSecondaryAd\x22,\x22deferredContainerView\x22\x3a\x22DoubleClick\x22\x7d,\x22viewName\x22\x3a\x22DoubleClick\x22\x7d');
var configuration = {"adId":"OMP/pillsbury/recipe/300x250_bottom","minPageWidth":"1000","maxPageWidth":"9999","defaultMinPageWidth":"1000","defaultMaxPageWidth":"9999","size":"[[300,600],[300,250]]","refreshWhenViewed":false,"adContainerId":"7001ea8b-a0c1-4e6c-bba7-4c64c61fe941","doubleClickAdContainerId":"ee2f2ab3-9705-418d-8fa5-f978c28d6d6c","adCaptionText":"Advertisement","networkCode":"/15704463/","relevantMetadata":["Dessert","Pie","Apple"],"privacyOptOut":false,"adProvider":"Sovrn","sovrnCssClass":"pillsbury_right_rail","responsive":true,"contentType":"Recipe","itemId":"1fc2b60f-0a4f-441e-ad93-8bbd00fe5334","continuesBelowText":"Recipe Continues Below"};
var moduleName = 'sovrn';
var isVueModule = true;
GeneralMills.PandoSites.RegisterControlInstance(moduleName, configuration, componentMetadata, isVueModule)
});
})();
(function() {
document.addEventListener('DOMContentLoaded', function() {
var componentMetadata = JSON.parse('\x7b\x22componentName\x22\x3a\x22DoubleClick_6888191a-ef06-440e-a5ea-a3c8d1e006f9\x22,\x22deferOptions\x22\x3a\x7b\x22deferComponent\x22\x3afalse,\x22deferType\x22\x3a\x22None\x22,\x22deferId\x22\x3a\x22re7289258ca294d199881f0951d7e727f\x22,\x22deferredContainerId\x22\x3a\x22\x2fmain\x2frdpSecondaryAd\x22,\x22deferredContainerView\x22\x3a\x22DoubleClick\x22\x7d,\x22viewName\x22\x3a\x22DoubleClick\x22\x7d');
var configuration = {"adId":"OMP/m_pillsbury/recipes/300x250_bottom","minPageWidth":"299","maxPageWidth":"767","defaultMinPageWidth":"1000","defaultMaxPageWidth":"9999","size":"[[300,250], [300,600]]","refreshWhenViewed":false,"adContainerId":"73ee5706-84bd-426d-bc4b-a848c5638a6d","doubleClickAdContainerId":"36e4a510-eb0b-4dfa-ac9b-2034ca1ea0a8","adCaptionText":"Advertisement","networkCode":"/15704463/","relevantMetadata":["Dessert","Pie","Apple"],"privacyOptOut":false,"adProvider":"Sovrn","sovrnCssClass":"pillsbury_content_standard_rdp","responsive":true,"contentType":"Recipe","itemId":"1fc2b60f-0a4f-441e-ad93-8bbd00fe5334","continuesBelowText":"Recipe Continues Below"};
var moduleName = 'sovrn';
var isVueModule = true;
GeneralMills.PandoSites.RegisterControlInstance(moduleName, configuration, componentMetadata, isVueModule)
});
})();
(function() {
document.addEventListener('DOMContentLoaded', function() {
var componentMetadata = JSON.parse('\x7b\x22componentName\x22\x3a\x22NewsletterCTA_750a0129-7efb-4ea1-b271-19394f58ba28\x22,\x22deferOptions\x22\x3a\x7b\x22deferComponent\x22\x3atrue,\x22deferType\x22\x3a\x22OnDemand\x22,\x22deferId\x22\x3a\x22r553cd00b1bc24b4a970bb26f06be3b1f\x22,\x22deferredContainerId\x22\x3a\x22\x2fmain\x2frdpMobileSubscriber\x22,\x22deferredContainerView\x22\x3a\x22RecipeDetail\x22\x7d,\x22viewName\x22\x3a\x22NewsletterCTA\x22\x7d');
var configuration = {"unsubscribedNewsletters":[{"listId":"6d3e858f-4804-4f38-9b8a-712a9a5668cc","thumbnailImageUrl":"/-/media/GMI/Core-Sites/PB/Images/Shared/myaccount/newsletters/PB_Email_Thumb_200x200.gif?sc_lang=en","previewUrl":"https://morpheus3.idpk.net/email_sends/10626/preview","name":"Pillsbury\u0027s Email","isPromo":false}],"settings":{"anonymousCopy":"Looking For Something More?","anonymousDescriptionCopy":"You’ll love seeing our daily tips, trends and tasty recipes in your inbox.","anonymousThankYouCopy":"Thanks! Your first email is on its way.","anonymousThankYouDescriptionCopy":"\u003cp\u003e\u003cspan\u003eNow that you\u0026rsquo;re signed up, create an account on Pillsbury.com to save your favorite recipes, learn more about special promotions and get meal inspiration for any occasion.\u003c/span\u003e\u003c/p\u003e","anonymousButtonText":"Sign Me Up","anonymousEmailInvalidErrorText":"Please enter a valid email address.","anonymousSubscribeErrorText":"We encountered an error while signing you up. Please try again.","anonymousEmailAddressPlaceholderText":"Enter your email address","anonymousEmailAddressLabel":"Email Address","anonymousLegalCopy":"By signing up, you accept our\u0026nbsp;\u003ca rel=\u0022noopener noreferrer\u0022 href=\u0022https://www.generalmills.com/privacy-security/us-english-privacy-policy\u0022 target=\u0022_blank\u0022\u003e\u003cspan style=\u0022text-decoration: underline;\u0022\u003ePrivacy Policy\u003c/span\u003e\u003c/a\u003e\u0026nbsp;and agree that your information may be used across our\u0026nbsp;\u003ca rel=\u0022noopener noreferrer\u0022 href=\u0022https://www.generalmills.com/food-we-make/brands\u0022 target=\u0022_blank\u0022\u003e\u003cspan style=\u0022text-decoration: underline;\u0022\u003efamily of brands\u003c/span\u003e.\u003c/a\u003e","requiredFieldText":"","backgroundColor":"#EEEEEE","accentColor":"","registrationUrl":"/register/reg-fp?RegAction=SUBSCRIBERUPGRADE\u0026esrc=14171\u0026returnUrl=%2frecipes%2fperfect-apple-pie%2f1fc2b60f-0a4f-441e-ad93-8bbd00fe5334%3fwt.mc_id%3dpaid_bannerad_4771137_997356%26sc%3d15835","registrationLinkText":"Sign Up!","enableExpandedFields":false,"hideForSessionCookieExpiration":0,"ctaType":"StandardAnonymous","location":"Inline","userState":"Anonymous","sourceCodeOverride":0}};
var moduleName = 'newsletterCta';
var isVueModule = true;
GeneralMills.PandoSites.RegisterControlInstance(moduleName, configuration, componentMetadata, isVueModule)
});
})();
(function() {
document.addEventListener('DOMContentLoaded', function() {
var componentMetadata = JSON.parse('\x7b\x22componentName\x22\x3a\x22NewsletterCTA_0dc75a39-1c1e-4402-8652-7d0468ad2038\x22,\x22deferOptions\x22\x3a\x7b\x22deferComponent\x22\x3atrue,\x22deferType\x22\x3a\x22OnDemand\x22,\x22deferId\x22\x3a\x22r4d42d052a2184b5995cbffdcdd002d56\x22,\x22deferredContainerId\x22\x3a\x22\x2fmain\x2frdpInlineSubscriber\x22,\x22deferredContainerView\x22\x3a\x22RecipeDetail\x22\x7d,\x22viewName\x22\x3a\x22NewsletterCTA\x22\x7d');
var configuration = {"unsubscribedNewsletters":[{"listId":"6d3e858f-4804-4f38-9b8a-712a9a5668cc","thumbnailImageUrl":"/-/media/GMI/Core-Sites/PB/Images/Shared/myaccount/newsletters/PB_Email_Thumb_200x200.gif?sc_lang=en","previewUrl":"https://morpheus3.idpk.net/email_sends/10626/preview","name":"Pillsbury\u0027s Email","isPromo":false}],"settings":{"anonymousCopy":"Delicious meal inspiration found here.","anonymousDescriptionCopy":"Spend less time searching and more time with your family. With Pillsbury\u0027s newsletter, you\u0027ll have easy access to all the quick \u0026amp; easy, kid-pleasing recipes that make dinnertime a breeze.","anonymousThankYouCopy":"Thanks! Your first email is on its way.","anonymousThankYouDescriptionCopy":"\u003cp\u003e\u003cspan\u003eNow that you\u0026rsquo;re signed up, create an account on Pillsbury.com to save your favorite recipes, learn more about special promotions and get meal inspiration for any occasion.\u003c/span\u003e\u003c/p\u003e","anonymousButtonText":"Sign up now","anonymousEmailInvalidErrorText":"Please enter a valid email address.","anonymousSubscribeErrorText":"We encountered an error while signing you up. Please try again.","anonymousEmailAddressPlaceholderText":"Enter your email address","anonymousEmailAddressLabel":"Email Address","anonymousLegalCopy":"By signing up, you accept our\u0026nbsp;\u003ca rel=\u0022noopener noreferrer\u0022 href=\u0022https://www.generalmills.com/privacy-security/us-english-privacy-policy\u0022 target=\u0022_blank\u0022\u003e\u003cspan style=\u0022text-decoration: underline;\u0022\u003ePrivacy Policy\u003c/span\u003e\u003c/a\u003e\u0026nbsp;and agree that your information may be used across our\u0026nbsp;\u003ca rel=\u0022noopener noreferrer\u0022 href=\u0022https://www.generalmills.com/food-we-make/brands\u0022 target=\u0022_blank\u0022\u003e\u003cspan style=\u0022text-decoration: underline;\u0022\u003efamily of brands\u003c/span\u003e.\u003c/a\u003e","requiredFieldText":"","backgroundColor":"#002e6d","accentColor":"","registrationUrl":"/register/reg-fp?RegAction=SUBSCRIBERUPGRADE\u0026esrc=14171\u0026returnUrl=%2frecipes%2fperfect-apple-pie%2f1fc2b60f-0a4f-441e-ad93-8bbd00fe5334%3fwt.mc_id%3dpaid_bannerad_4771137_997356%26sc%3d15835","registrationLinkText":"Sign up now","enableExpandedFields":false,"hideForSessionCookieExpiration":0,"ctaType":"StandardAnonymous","location":"Rail","userState":"Anonymous","sourceCodeOverride":0}};
var moduleName = 'newsletterCta';
var isVueModule = true;
GeneralMills.PandoSites.RegisterControlInstance(moduleName, configuration, componentMetadata, isVueModule)
});
})();
(function() {
document.addEventListener('DOMContentLoaded', function() {
var componentMetadata = JSON.parse('\x7b\x22componentName\x22\x3a\x22DoubleClick_19a506b6-0306-4245-8826-f3cd4e04d386\x22,\x22deferOptions\x22\x3a\x7b\x22deferComponent\x22\x3afalse,\x22deferType\x22\x3a\x22None\x22,\x22deferId\x22\x3a\x22r50da23ad71b74243b2ebdf942205feea\x22,\x22deferredContainerId\x22\x3a\x22\x2fmain\x2frdpTernaryAd\x22,\x22deferredContainerView\x22\x3a\x22DoubleClick\x22\x7d,\x22viewName\x22\x3a\x22DoubleClick\x22\x7d');
var configuration = {"adId":"OMP/pillsbury/recipe/300x250_bottom2","minPageWidth":"1000","maxPageWidth":"9999","defaultMinPageWidth":"1000","defaultMaxPageWidth":"9999","size":"[[300,600],[300,250]]","refreshWhenViewed":false,"adContainerId":"9847ff38-6ec6-4abc-9cbe-bb5db0091c2c","doubleClickAdContainerId":"a0ab6ce2-1273-455a-8eea-ebc887dcb571","adCaptionText":"Advertisement","networkCode":"/15704463/","relevantMetadata":["Dessert","Pie","Apple"],"privacyOptOut":false,"adProvider":"Sovrn","sovrnCssClass":"pillsbury_right_rail","responsive":true,"contentType":"Recipe","itemId":"1fc2b60f-0a4f-441e-ad93-8bbd00fe5334","continuesBelowText":"Recipe Continues Below"};
var moduleName = 'sovrn';
var isVueModule = true;
GeneralMills.PandoSites.RegisterControlInstance(moduleName, configuration, componentMetadata, isVueModule)
});
})();
(function() {
document.addEventListener('DOMContentLoaded', function() {
var componentMetadata = JSON.parse('\x7b\x22componentName\x22\x3a\x22NewsletterCTA_e408bfac-a9a5-4f9f-8ce2-a693d736410d\x22,\x22deferOptions\x22\x3a\x7b\x22deferComponent\x22\x3atrue,\x22deferType\x22\x3a\x22OnDemand\x22,\x22deferId\x22\x3a\x22r21db1bfd5b404461afcc89e12fd46276\x22,\x22deferredContainerId\x22\x3a\x22\x2ffooterNewsLetterCTA\x22,\x22deferredContainerView\x22\x3a\x22Default\x22\x7d,\x22viewName\x22\x3a\x22NewsletterCTA\x22\x7d');
var configuration = {"unsubscribedNewsletters":[{"listId":"6d3e858f-4804-4f38-9b8a-712a9a5668cc","thumbnailImageUrl":"/-/media/GMI/Core-Sites/PB/Images/Shared/myaccount/newsletters/PB_Email_Thumb_200x200.gif?sc_lang=en","previewUrl":"https://morpheus3.idpk.net/email_sends/10626/preview","name":"Pillsbury\u0027s Email","isPromo":false}],"settings":{"anonymousCopy":"Quick and easy meal ideas just for you.","anonymousDescriptionCopy":"Spread smiles around the dinner table with delicious, easy recipes from Pillsbury. Our newsletter brings the best, kid-pleasing dinner ideas Pillsbury has to offer directly to your inbox.","anonymousThankYouCopy":"Thanks! Your first email is on its way.","anonymousThankYouDescriptionCopy":"Now that you\u0027re signed up, create an account on Pillsbury.com to save your favorite recipes, learn more about special promotions and get meal inspiration for any occasion.","anonymousButtonText":"Sign up now","anonymousEmailInvalidErrorText":"Please enter a valid email address","anonymousSubscribeErrorText":"We encountered an error while signing you up. Please try again.","anonymousEmailAddressPlaceholderText":"","anonymousEmailAddressLabel":"Your Email Address","anonymousLegalCopy":"By signing up, you accept our\u0026nbsp;\u003ca rel=\u0022noopener noreferrer\u0022 href=\u0022https://www.generalmills.com/privacy-security/us-english-privacy-policy\u0022 target=\u0022_blank\u0022\u003e\u003cspan style=\u0022text-decoration: underline;\u0022\u003ePrivacy Policy\u003c/span\u003e\u003c/a\u003e\u0026nbsp;and agree that your information may be used across our\u0026nbsp;\u003ca rel=\u0022noopener noreferrer\u0022 href=\u0022https://www.generalmills.com/food-we-make/brands\u0022 target=\u0022_blank\u0022\u003e\u003cspan style=\u0022text-decoration: underline;\u0022\u003efamily of brands\u003c/span\u003e.\u003c/a\u003e","requiredFieldText":"","standardSmallImageUrl":"/-/media/GMI/Core-Sites/PB/PB/Images/MyAccount/acq-landing-pages-2024/Organic-Acquisition_Bottom-Banner_800x450_GrandsMonkeyBread.jpg?sc_lang=en","standardLargeImageUrl":"/-/media/GMI/Core-Sites/PB/PB/Images/MyAccount/acq-landing-pages-2024/Organic-Acquisition_Bottom-Banner_800x450_GrandsMonkeyBread.jpg?sc_lang=en","backgroundColor":"#002E6D","accentColor":"","patternImageUrl":"/-/media/GMI/Core-Sites/PB/Images/Shared/myaccount/newsletter_cta_images/pb-footer-doughboy2x.png?sc_lang=en","registrationUrl":"/register/reg-fp?RegAction=SUBSCRIBERUPGRADE\u0026esrc=14171\u0026returnUrl=%2frecipes%2fperfect-apple-pie%2f1fc2b60f-0a4f-441e-ad93-8bbd00fe5334%3fwt.mc_id%3dpaid_bannerad_4771137_997356%26sc%3d15835","registrationLinkText":"Sign up now","enableExpandedFields":false,"hideForSessionCookieExpiration":0,"ctaType":"StandardAnonymous","location":"Footer","userState":"Anonymous","sourceCodeOverride":0}};
var moduleName = 'newsletterCta';
var isVueModule = true;
GeneralMills.PandoSites.RegisterControlInstance(moduleName, configuration, componentMetadata, isVueModule)
});
})();